ApeX Register
How to connect Wallet to ApeX via MetaMask
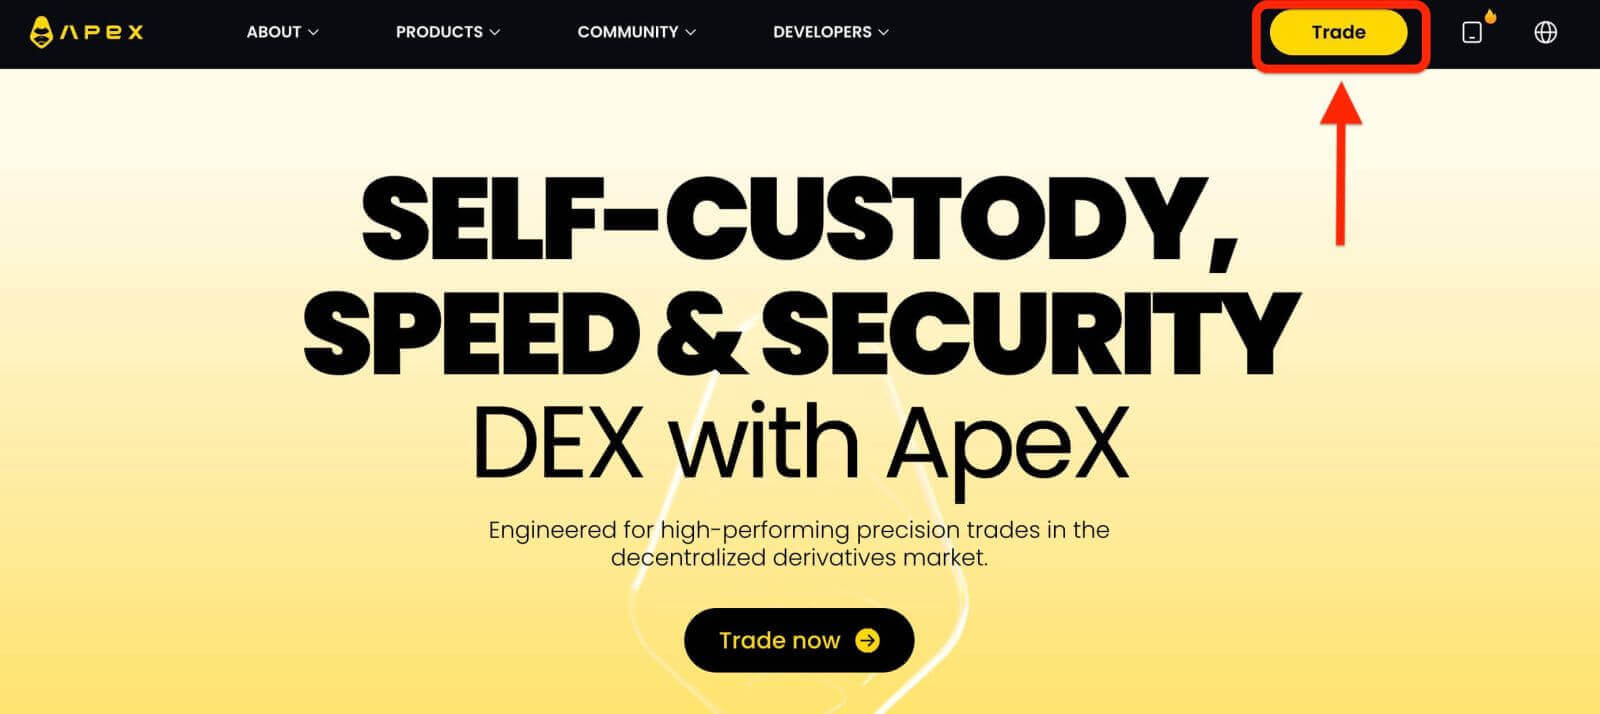
1. Firstly, you need to go to the [ApeX] website, then click on [Trade] in the top right corner of the page.
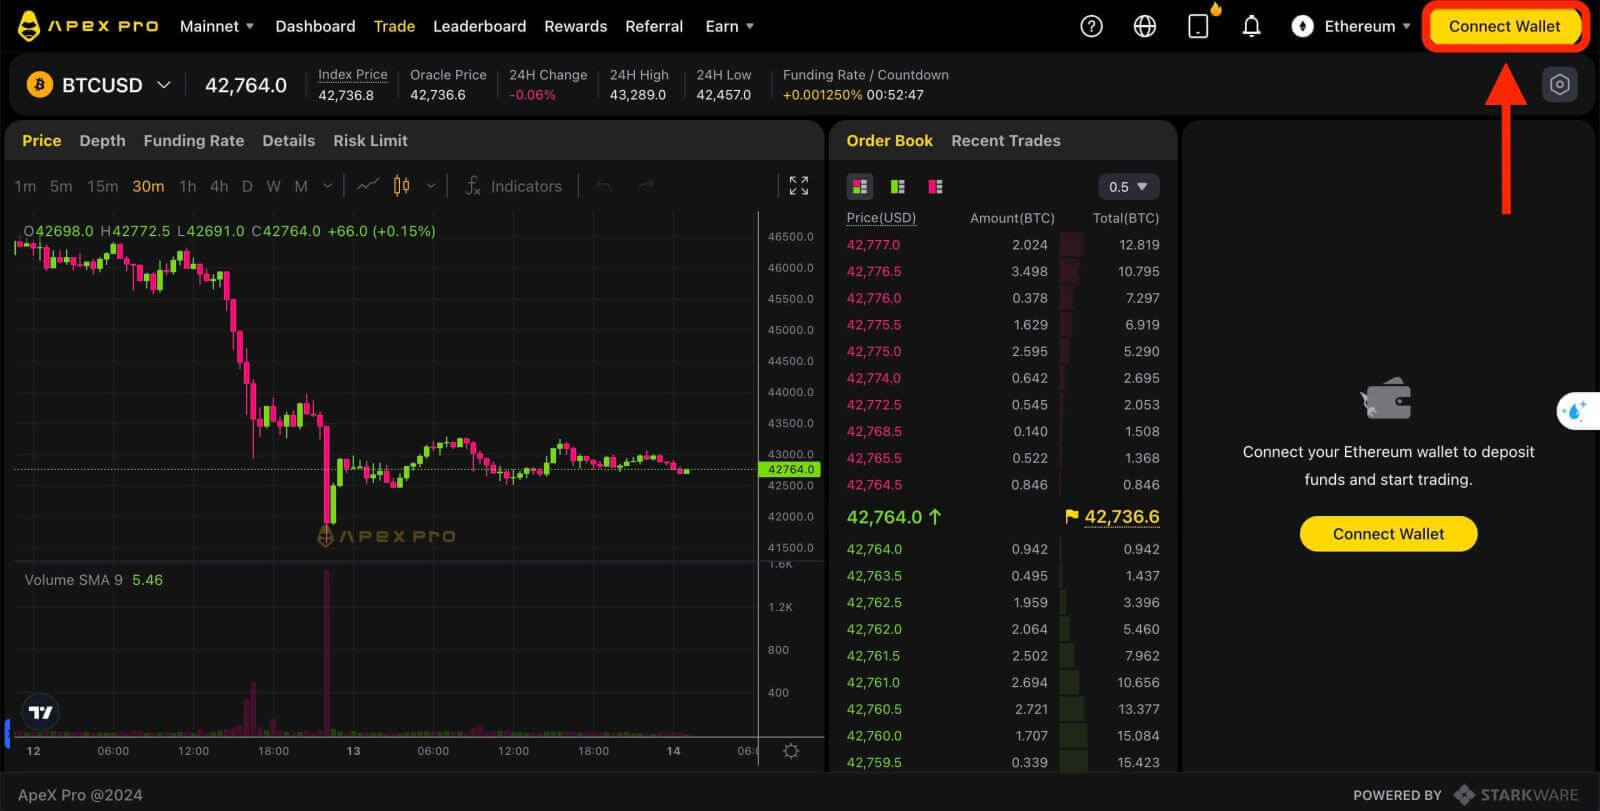
2. The website lets you in the Main Home page, then continue to click on the [Connect Wallet] in the top right corner.
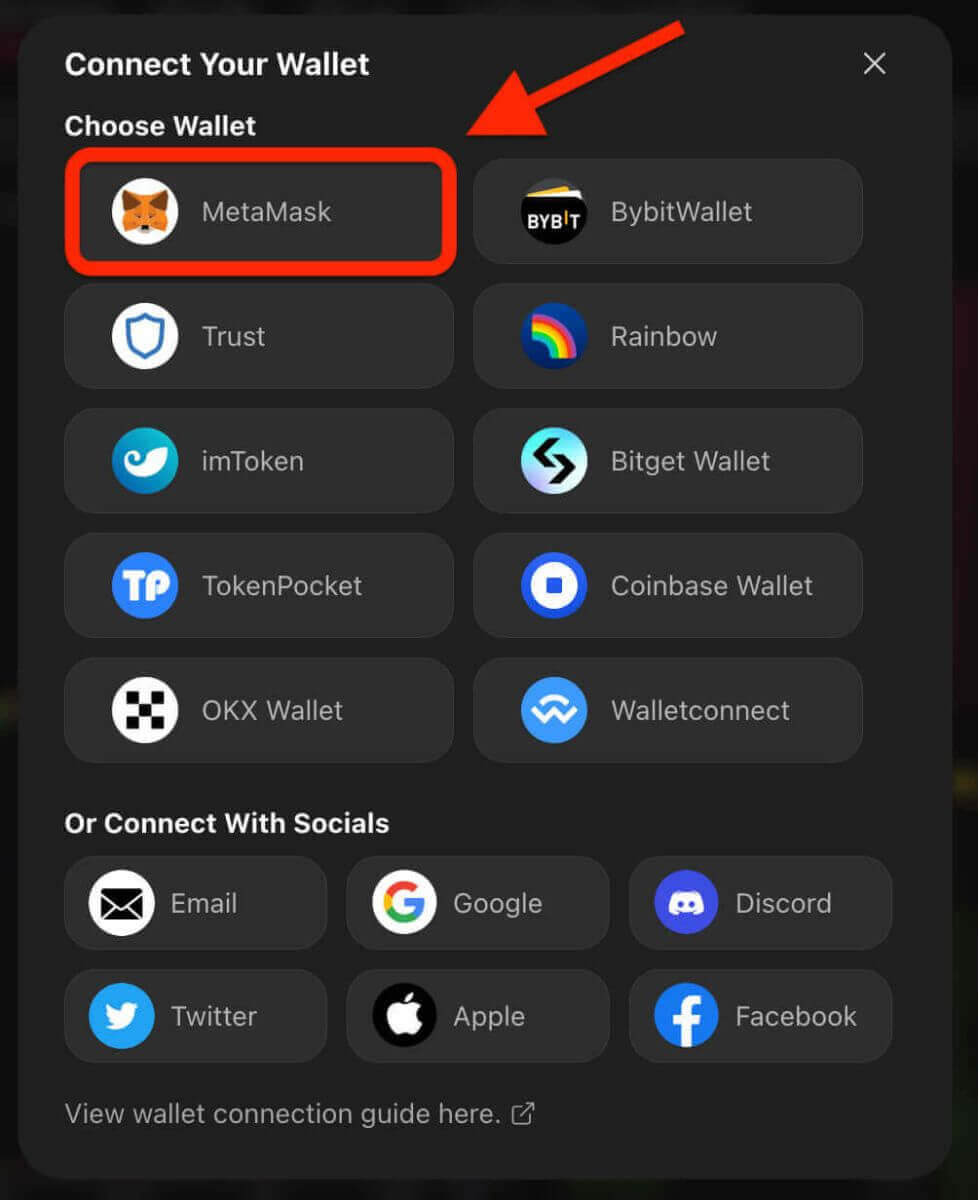
3. A pop-up window comes up, you need to choose and click on [Metamask] to choose Metamask wallet.
4. A Metamask prompt window will appear. Please approve the next two transactions including: Verifying your account(s) and confirming the connection.
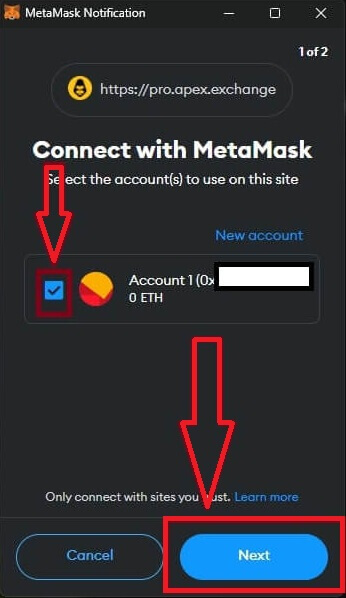
5. Select your account(s) to use on this site. Tap on the blank square cell on the left side of the account you want to connect with ApeX. Last, click [Next] to continue to the second step.
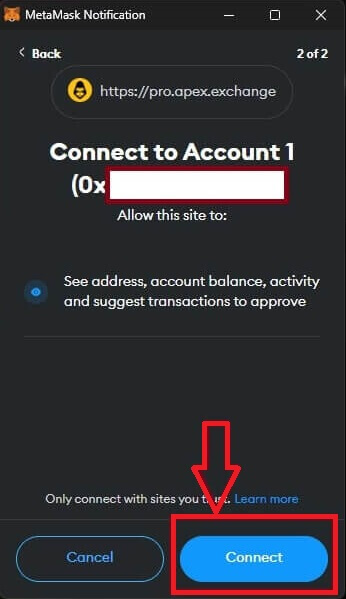
6. The next step is confirming your connection, you need to click on [Connect] to confirm your choice of account(s) and the connection with ApeX, if you are not sure about your choice of account(s) or connecting to ApeX you could click on [Cancel] to canceling this process.
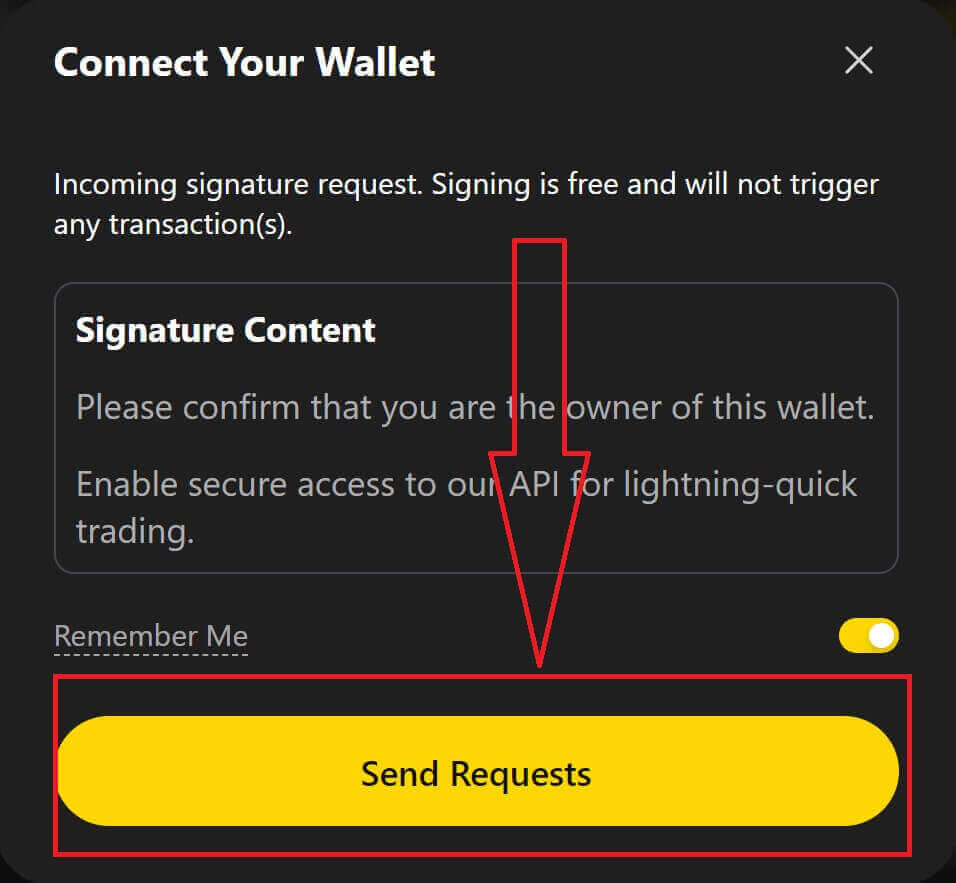
7. After the first step, if it is a success, you will get to the home page of ApeX. A pop-up Request will come up, you need to click on [Send Requests] to continue to the next step.
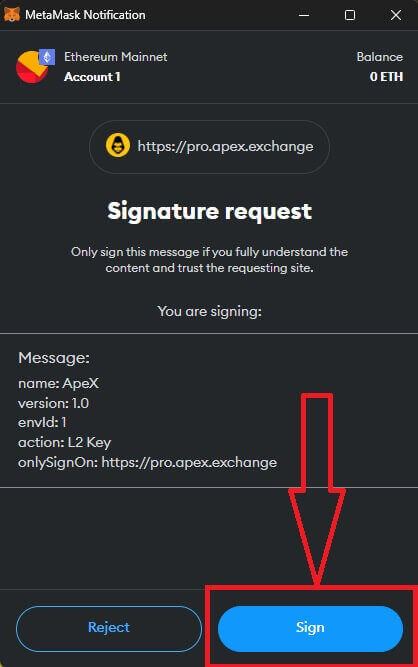
8. A pop-up window will come up to ask you for your signature to confirm that you are the owner of this wallet, click on [Sign] to complete the connection process.
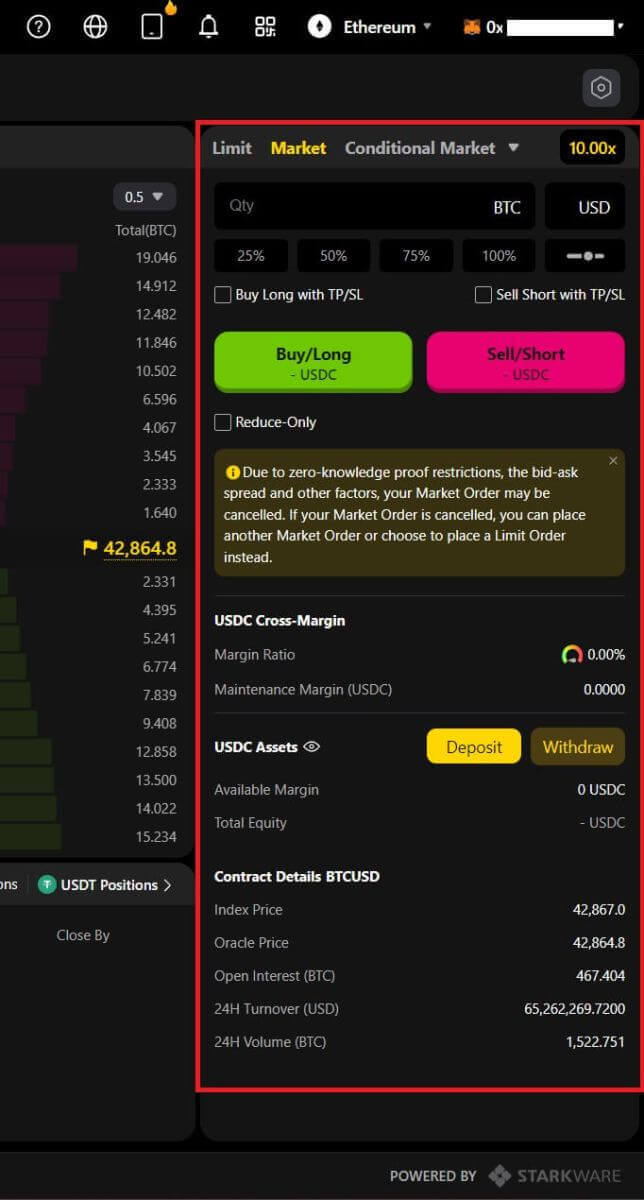
11. If it is a success, you will see an icon and your wallet number on your desktop in the top right corner of the ApeX web, and can start to trade on ApeX.
How to connect Wallet to ApeX via Trust
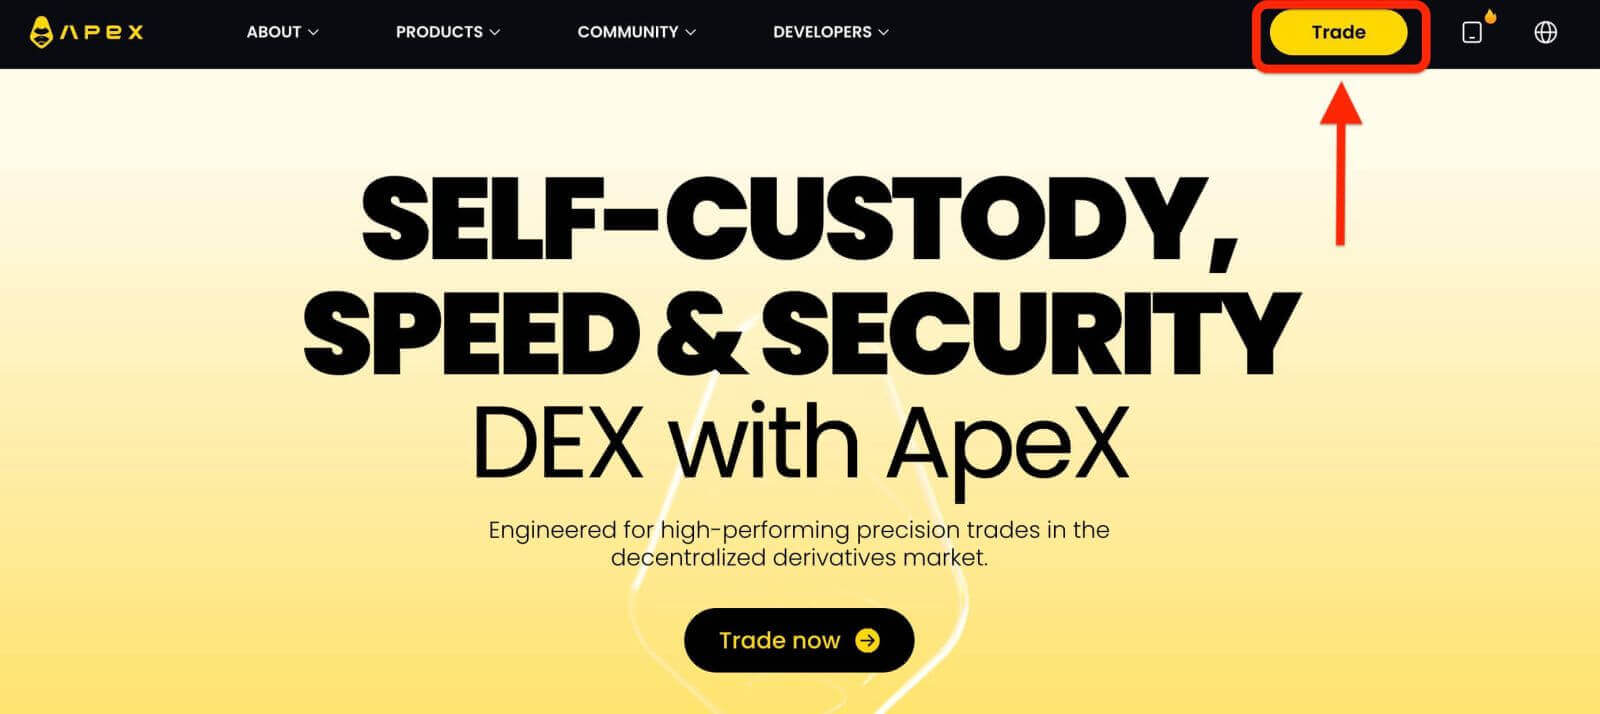
1. Firstly, you need to go to the [ApeX] website, then click on the [Trade] in the top right corner of the page.
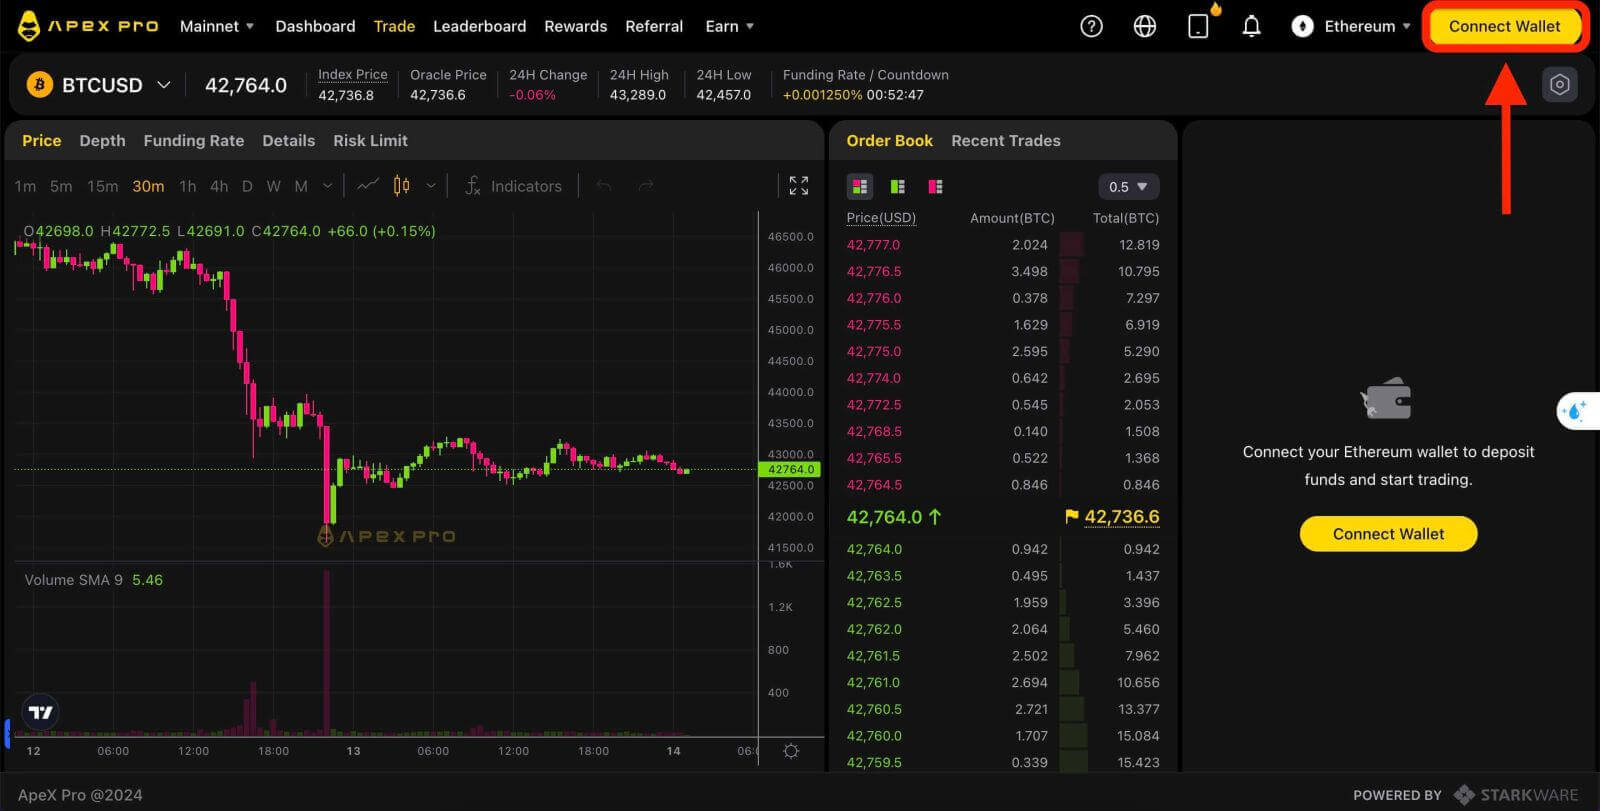
2. The website lets you in the Main Home page, then continue to click on the [Connect Wallet] in the top right corner.
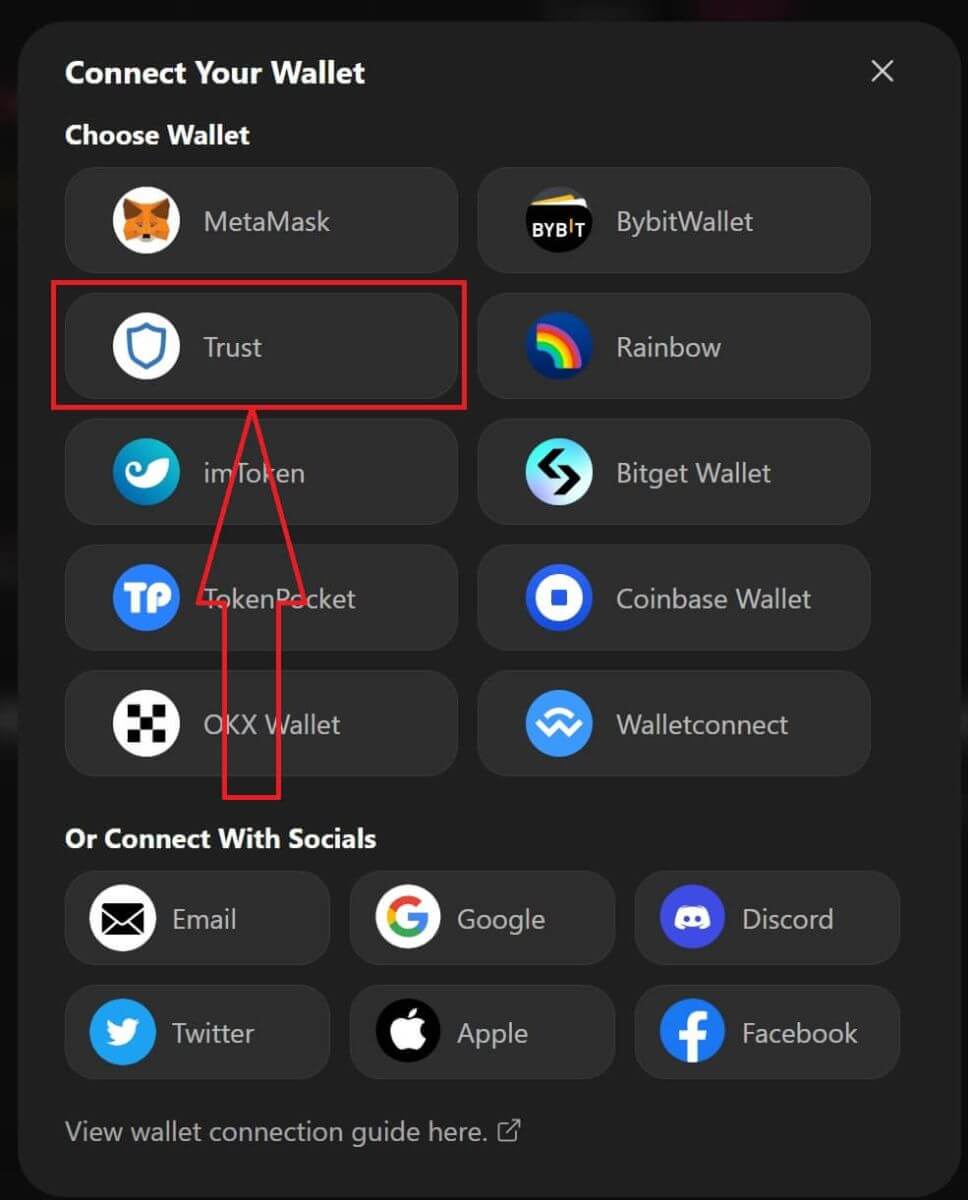
3. A pop-up window comes up, you need to choose and click on [Trust] to choose Trust wallet.
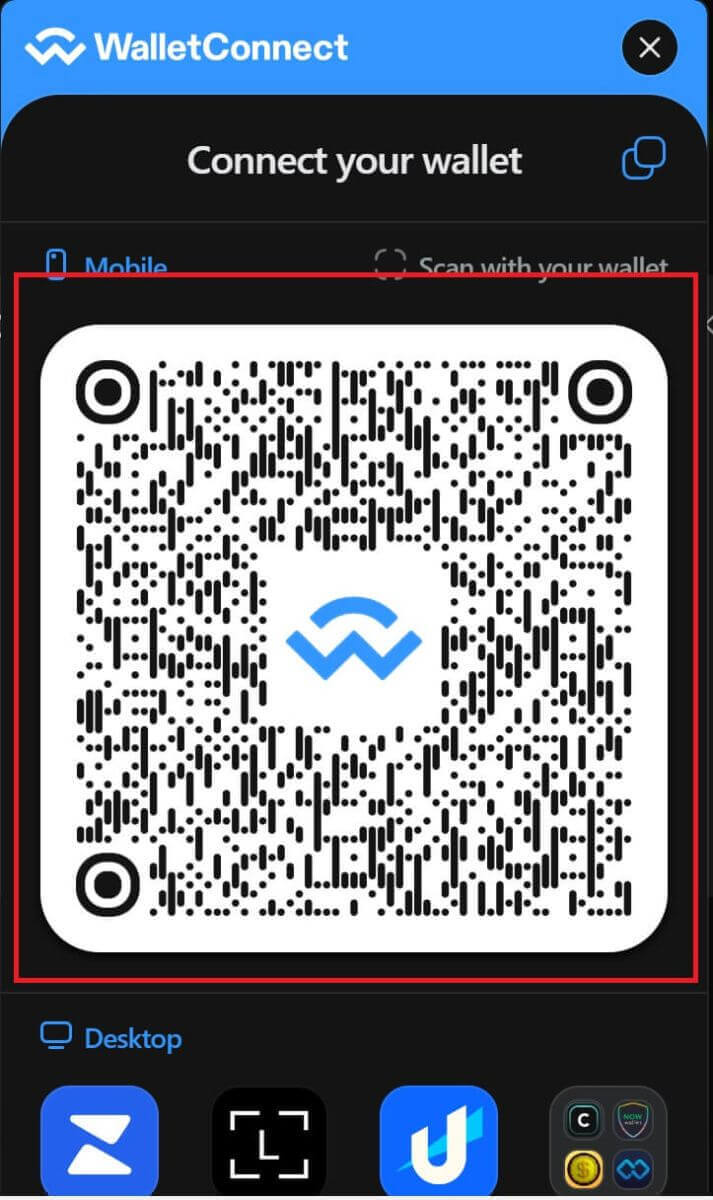
4. A QR code to Scan with your wallet on your mobile phone will appear. Please scan it by Trust app on your phone.
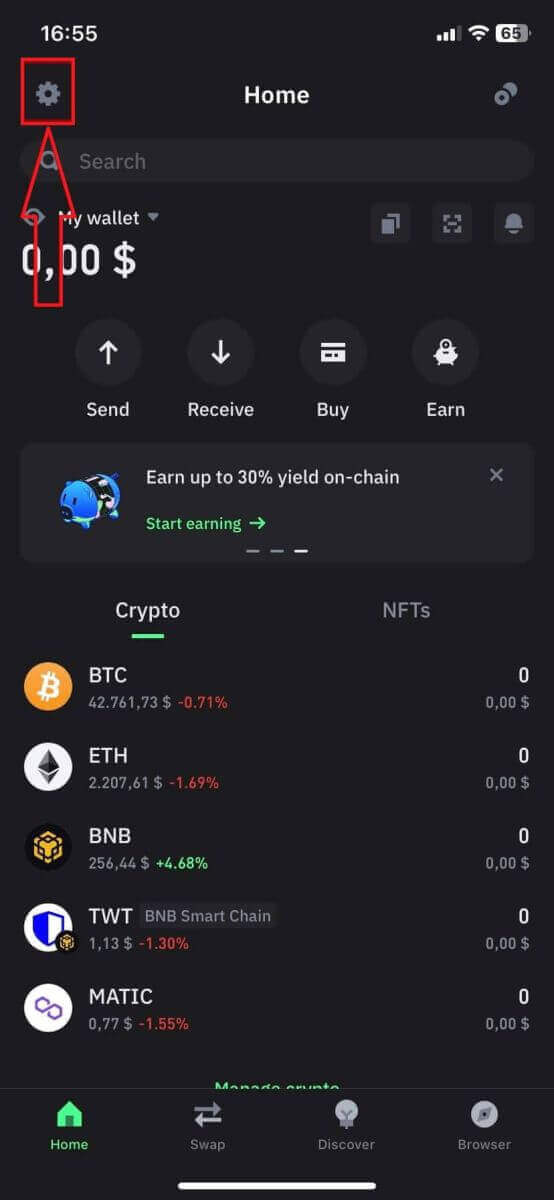
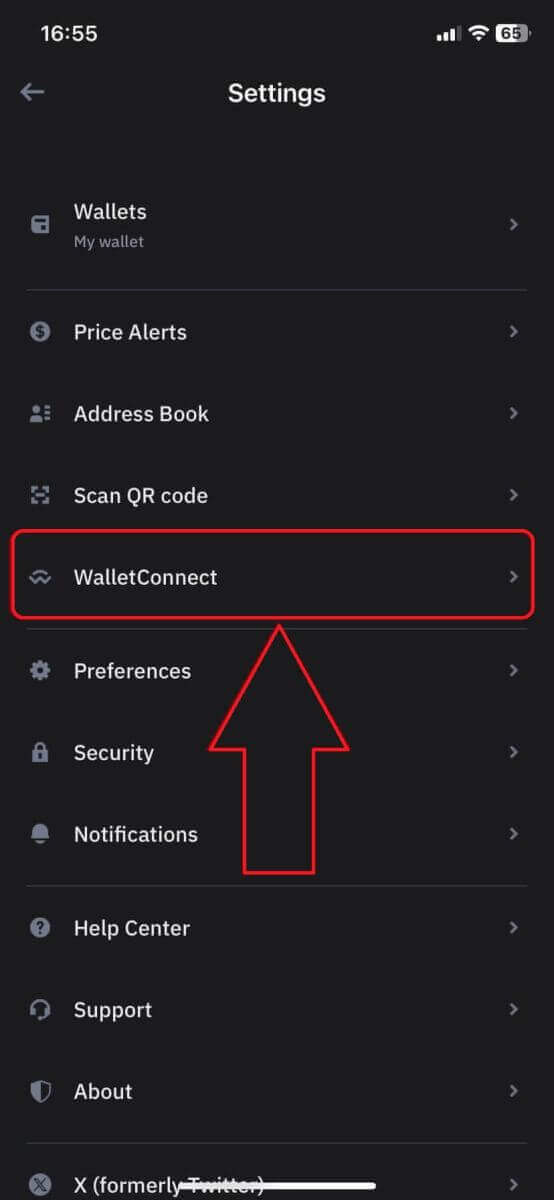
5. Open your phone and open the Trust app. After you get to the main screen, click on the setting icon in the top left corner. It will lead you to the settings menu. Click on [WalletConnect].
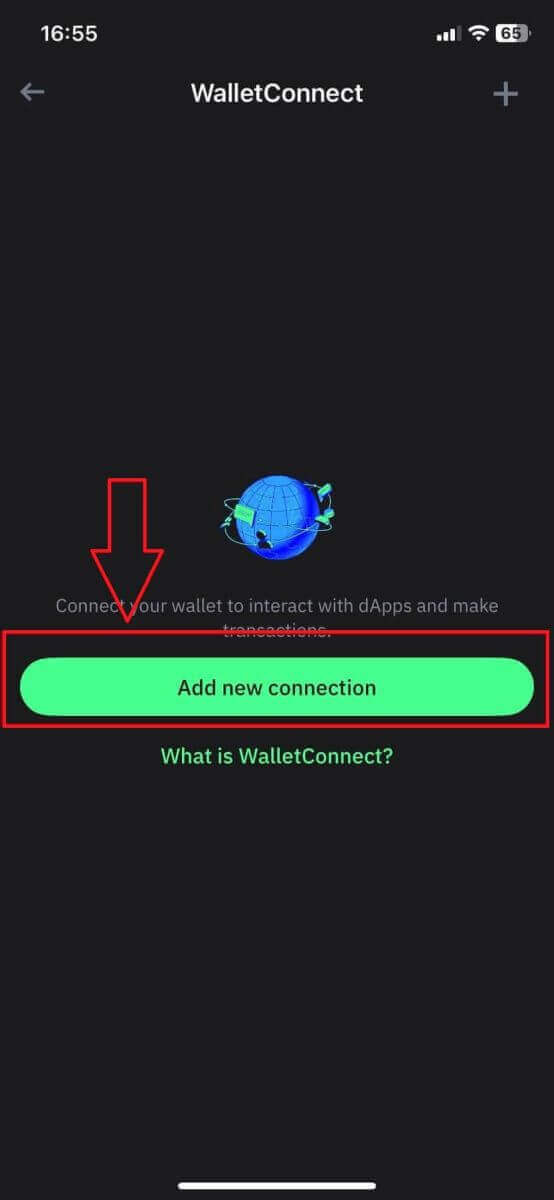
6. Choose [Add new connection] to add the connection with ApeX, it will lead to a scanning screen.
7. Now you need to point your phone’s camera to the QR code on your desktop screen to connect with Trust.
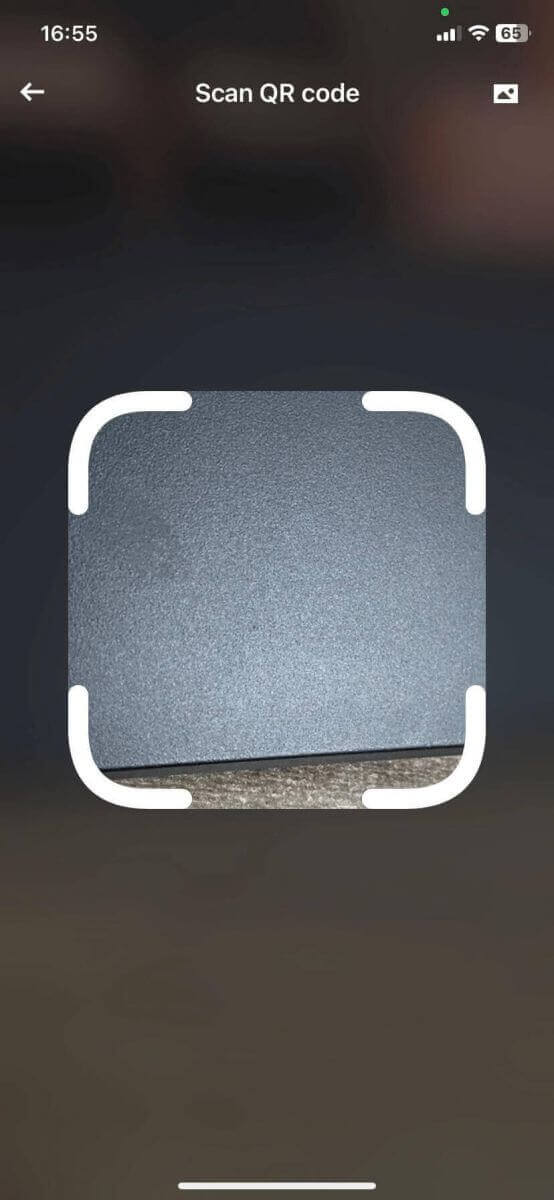
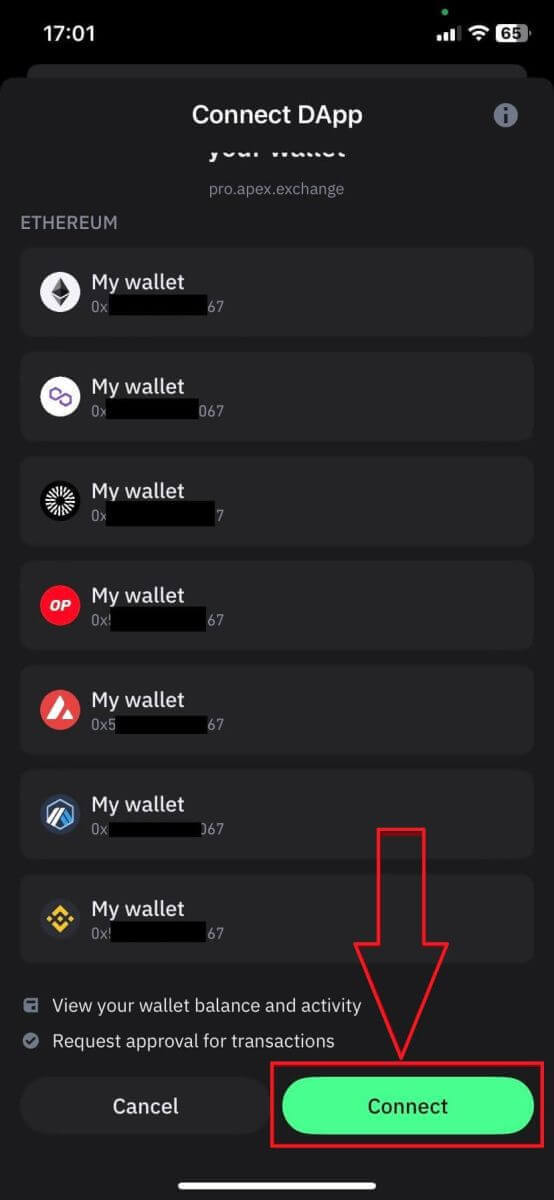
8. After scanning the QR code, a window will ask you whether to connect with ApeX.

9. Click on [Connect] to start the connection process.
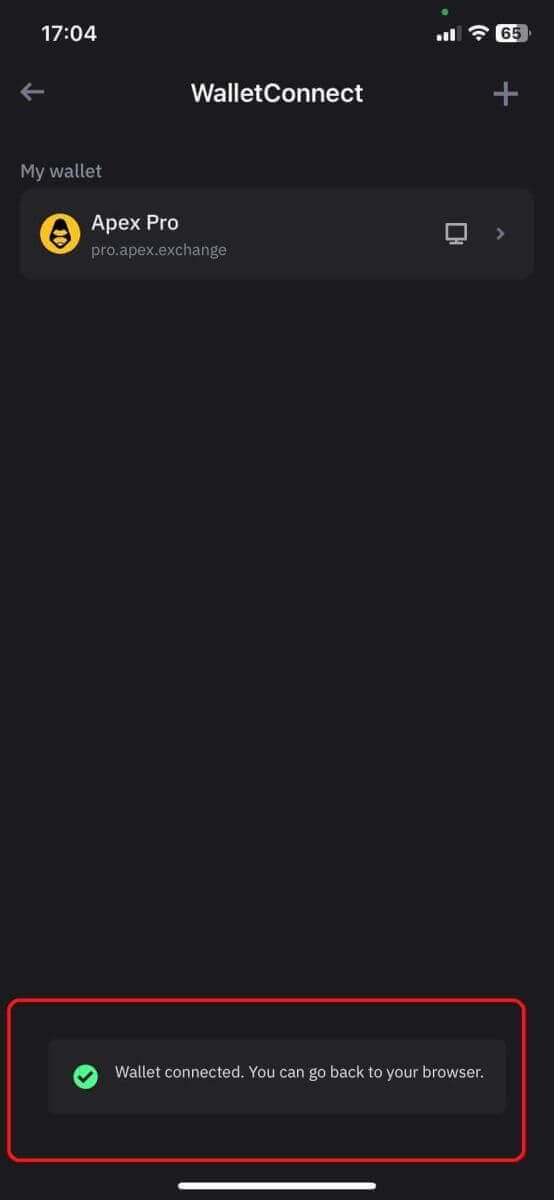
10. If it succeeds, it will pop up a message like the above, and then continue with your connection process on your desktop.
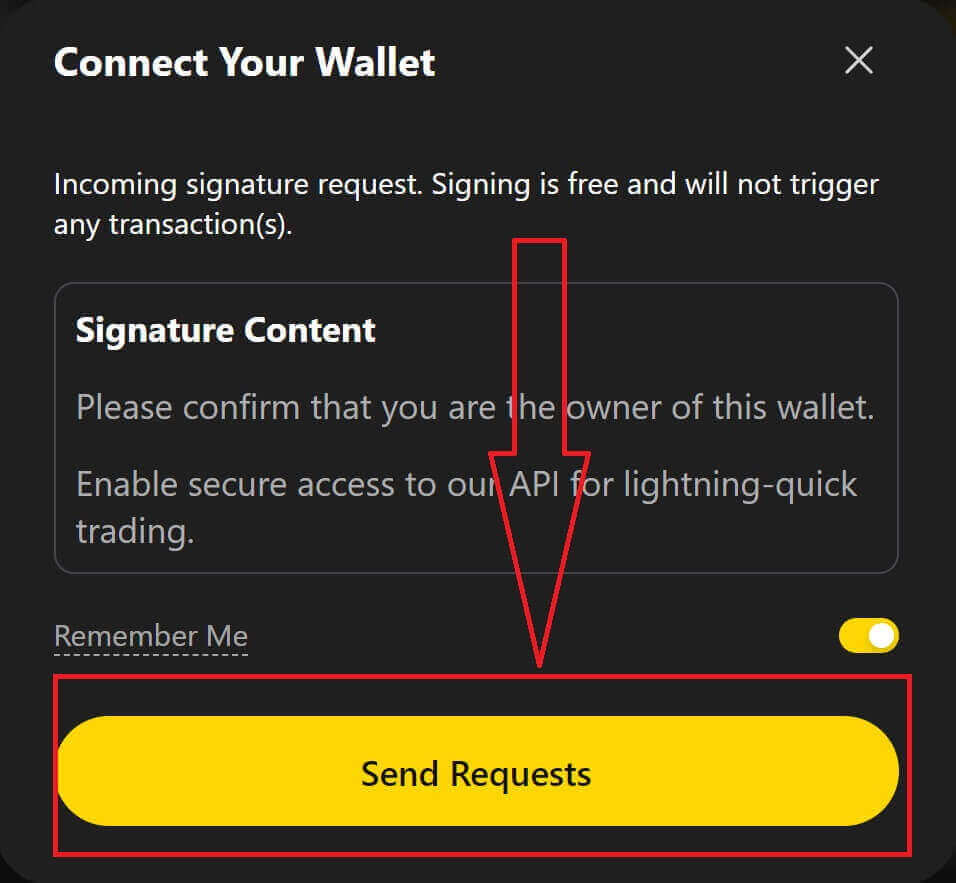
11. A pop-up window will appear to ask you for a Signature request on your phone, this step needs you to confirm you are the owner of that Trust wallet. Click on [Send Request] to continue the connection process on your phone.
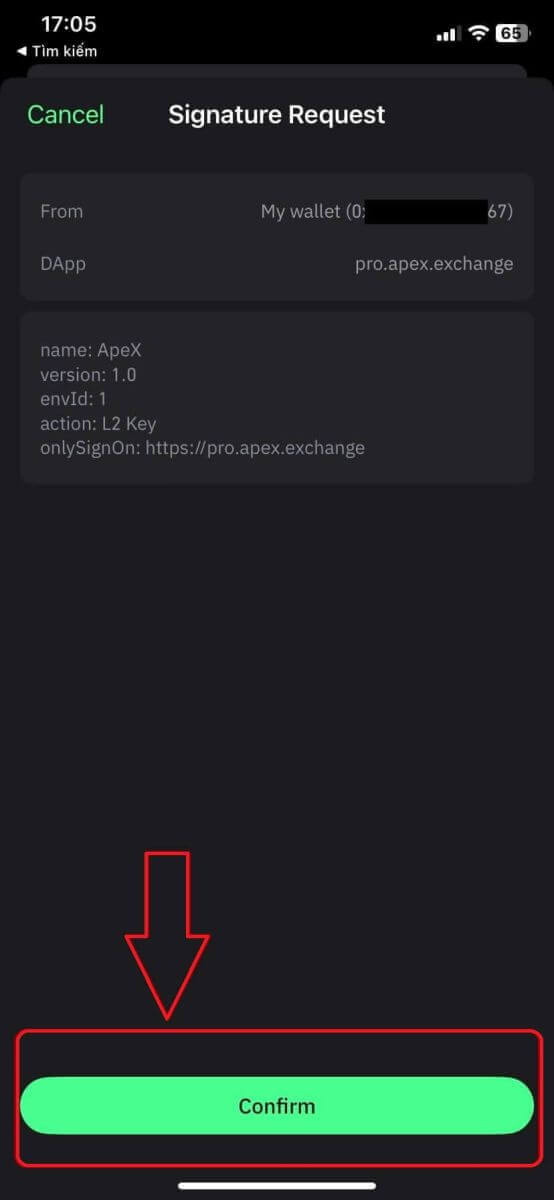
12. A pop-up window will appear on your phone, click on [Confirm] to complete the connection process.
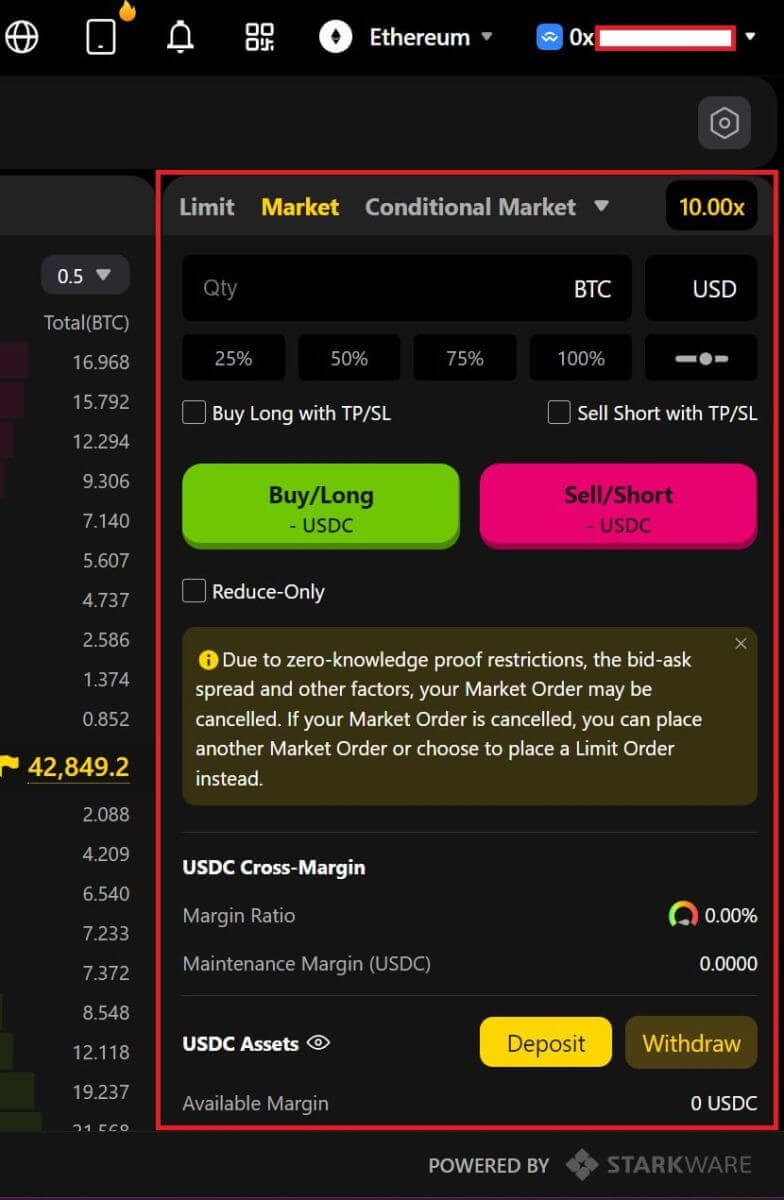
13. If it is a success, you will see an icon and your wallet number on your desktop in the top right corner of the ApeX web.
How to connect Wallet to ApeX via BybitWallet
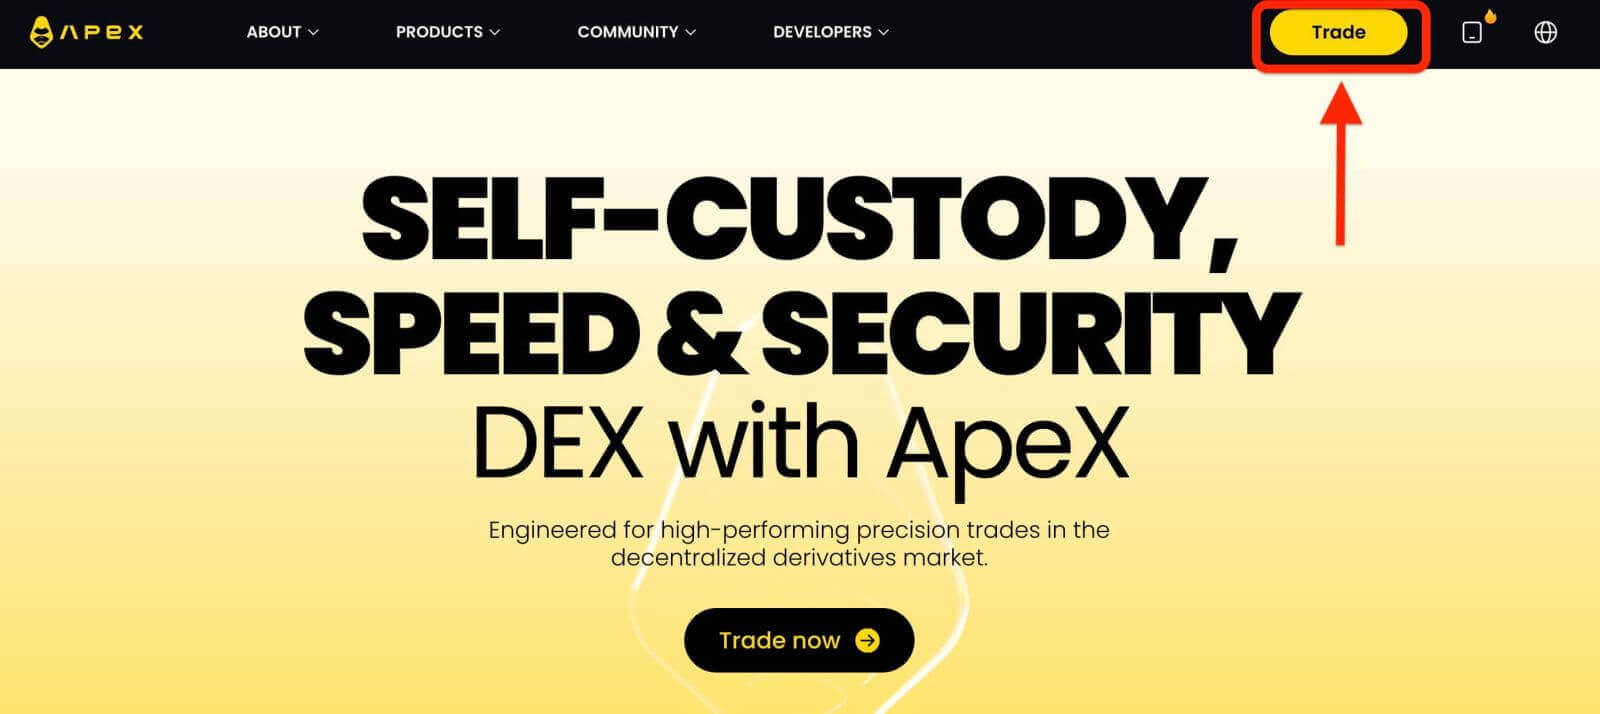
1. Firstly, you need to go to the [ApeX] website, then click on the [Trade] in the top right corner of the page.
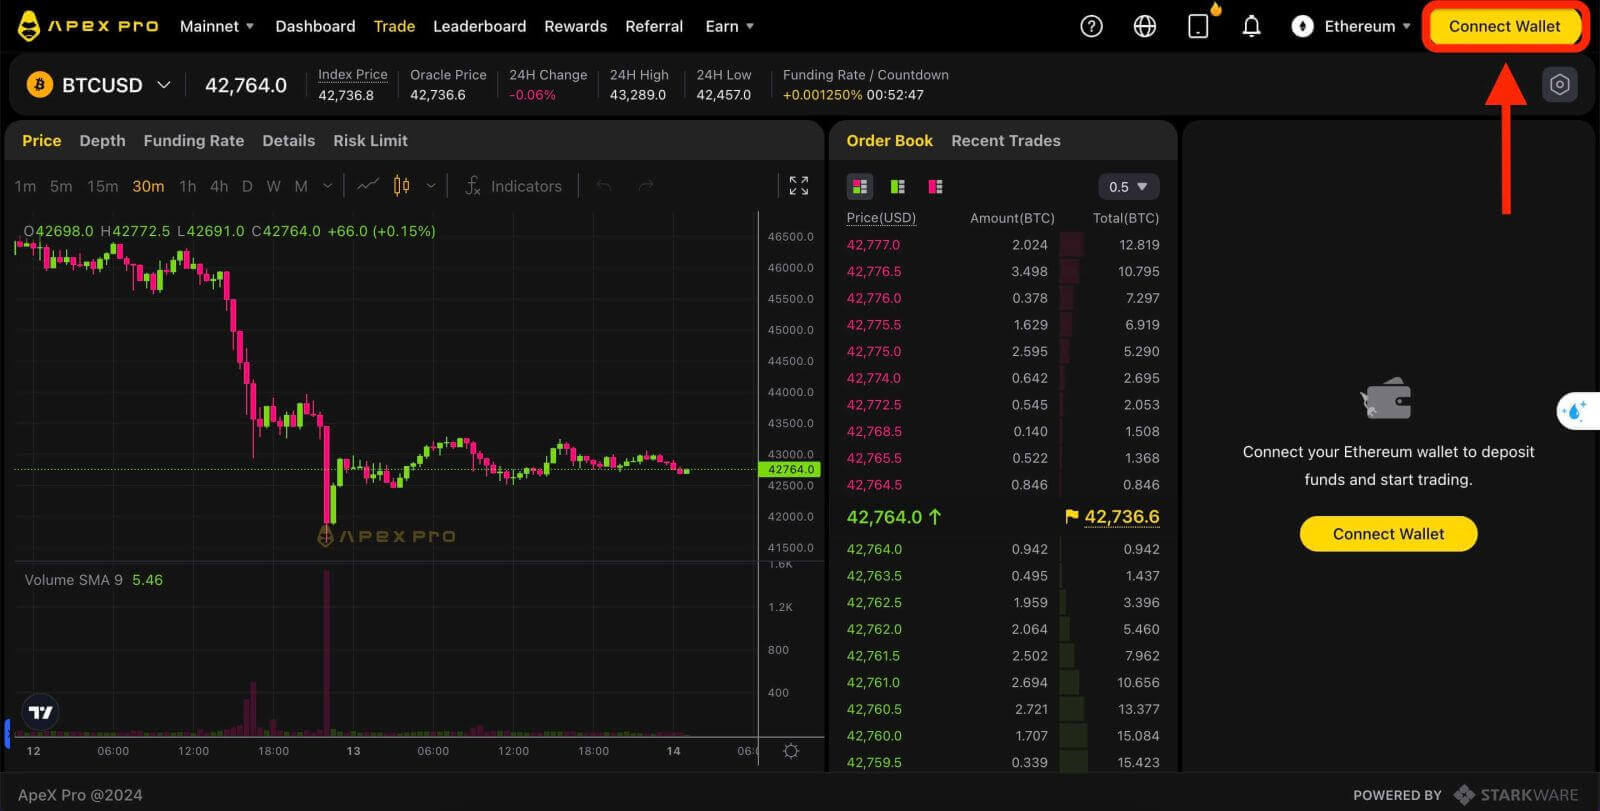
2. The website lets you in the Main Home page, then continue to click on the [Connect Wallet] in the top right corner.
3. A pop-up window comes up, you need to click on [BybitWallet] to choose BybitWallet.
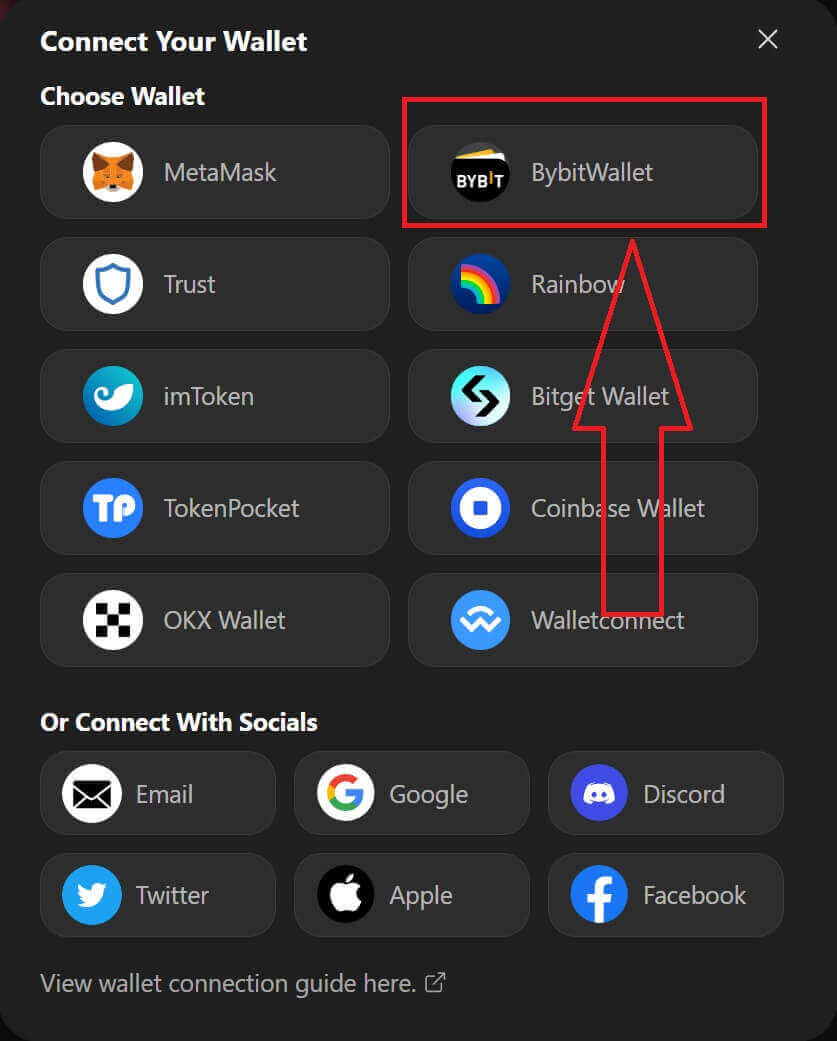
4. Before that, make sure that you have added the BybitWallet extension on your Chrome or any Internet Explorer.
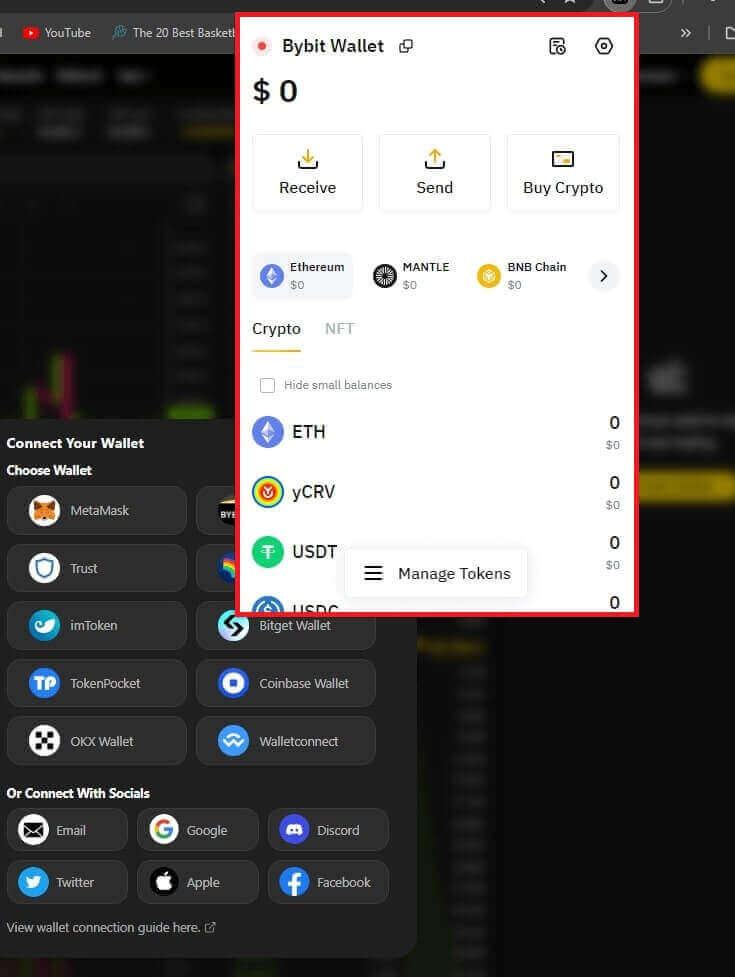
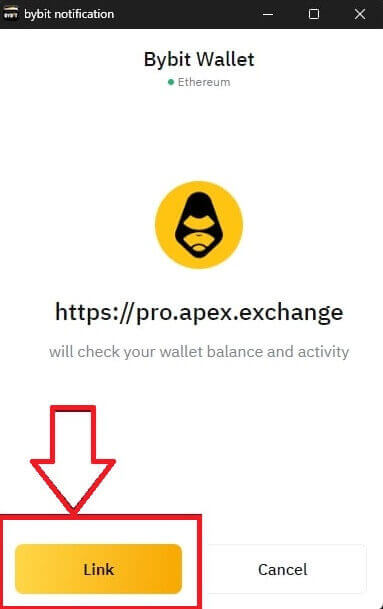
5. Click on [Link] to start the connection process.
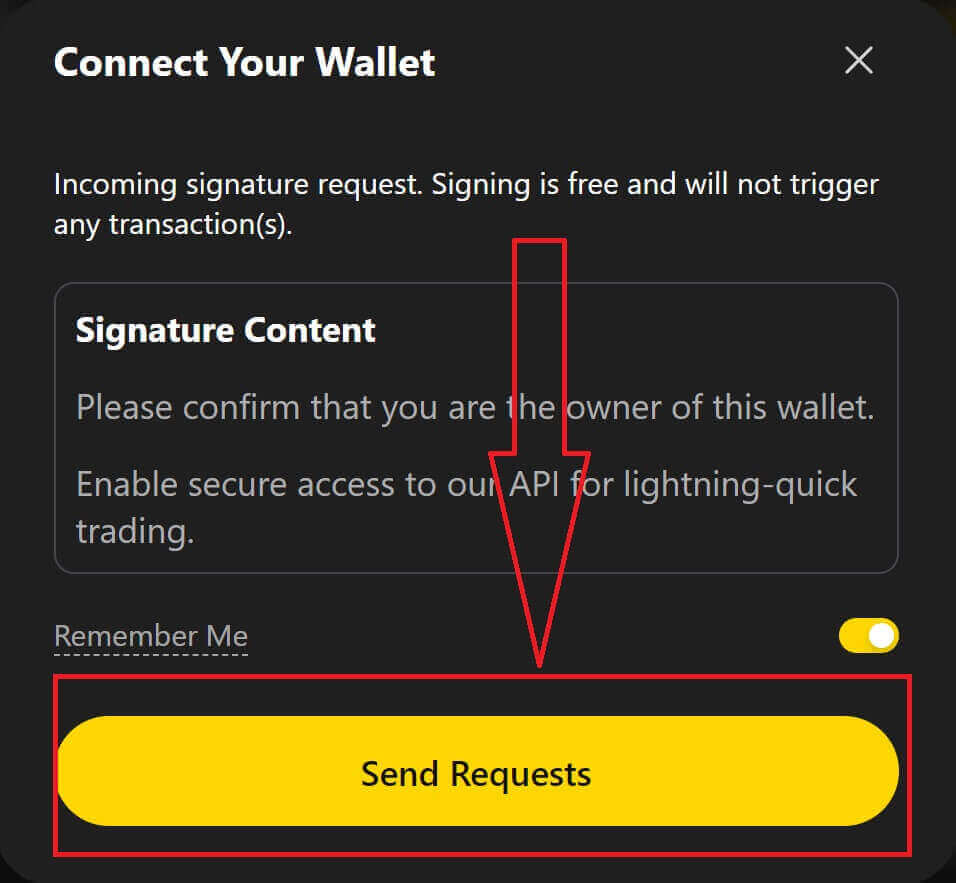
6. After connecting, A pop-up Request will come up, you need to click on [Send Requests] to continue the next step.
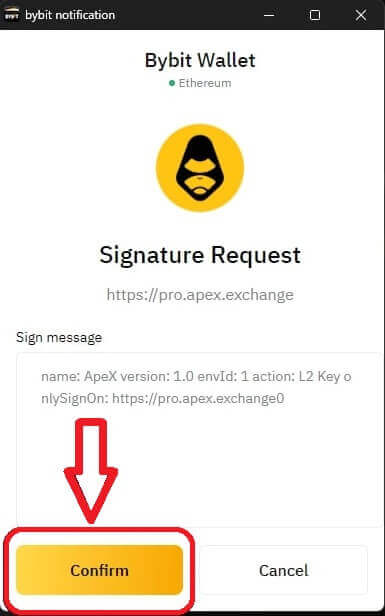
7. A pop-up window will come up to ask you for your signature to confirm that you are the owner of this wallet, click on [Confirm] to complete the connection process.
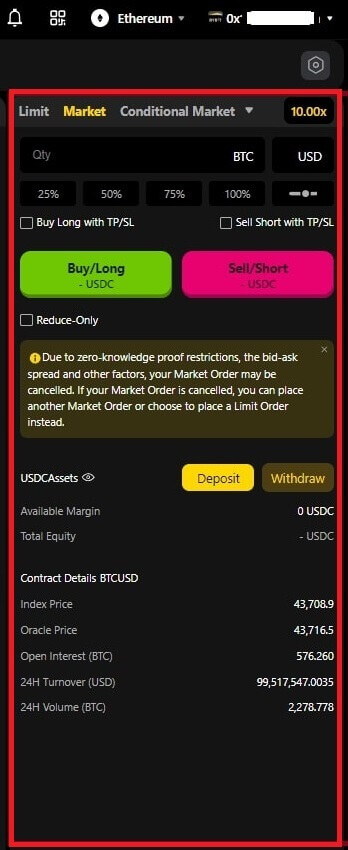
8. If it is a success, you can start trading in ApeX.
How to connect Wallet to ApeX via Coinbase Wallet
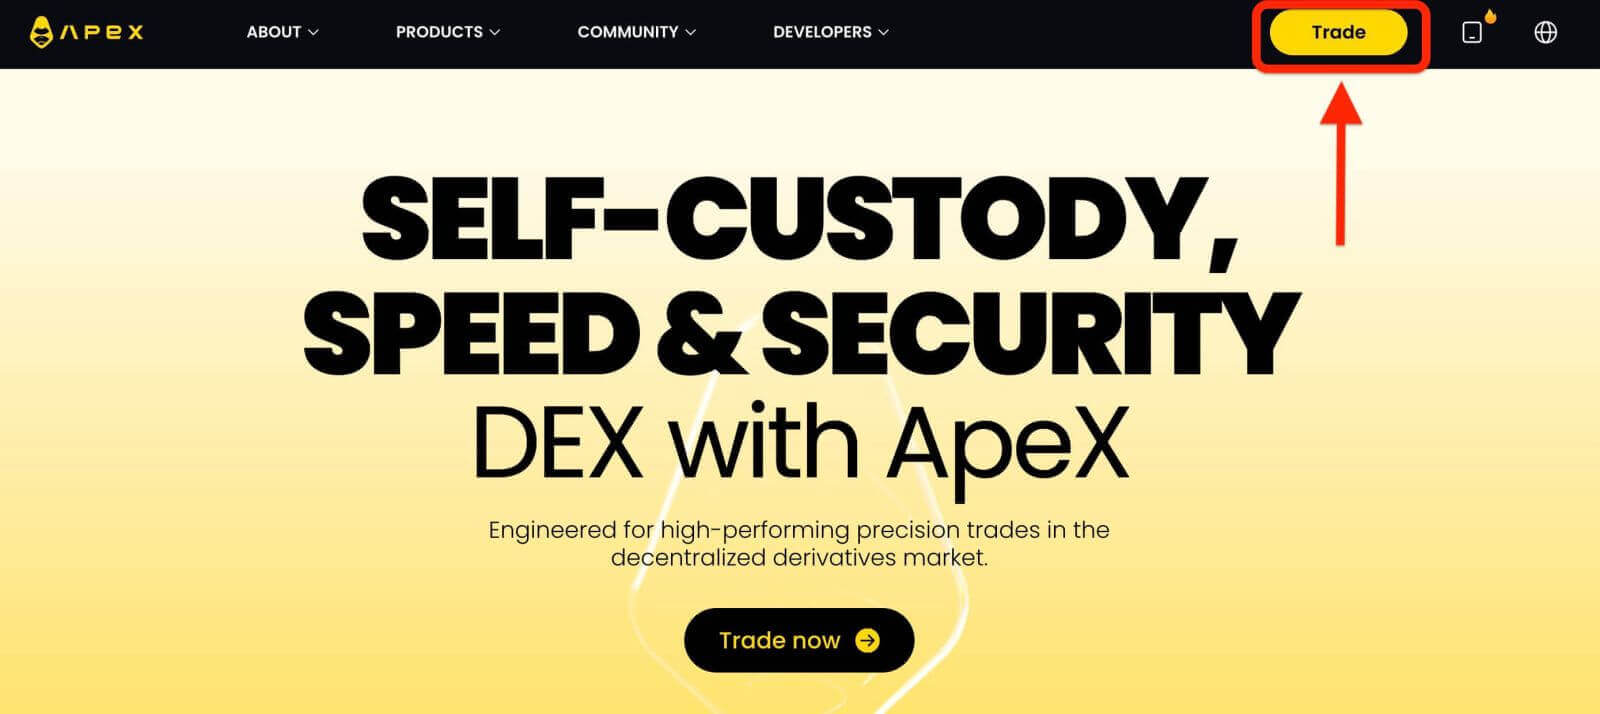
1. Firstly, you need to go to the [ApeX] website, then click on the [Trade] in the top right corner of the page.
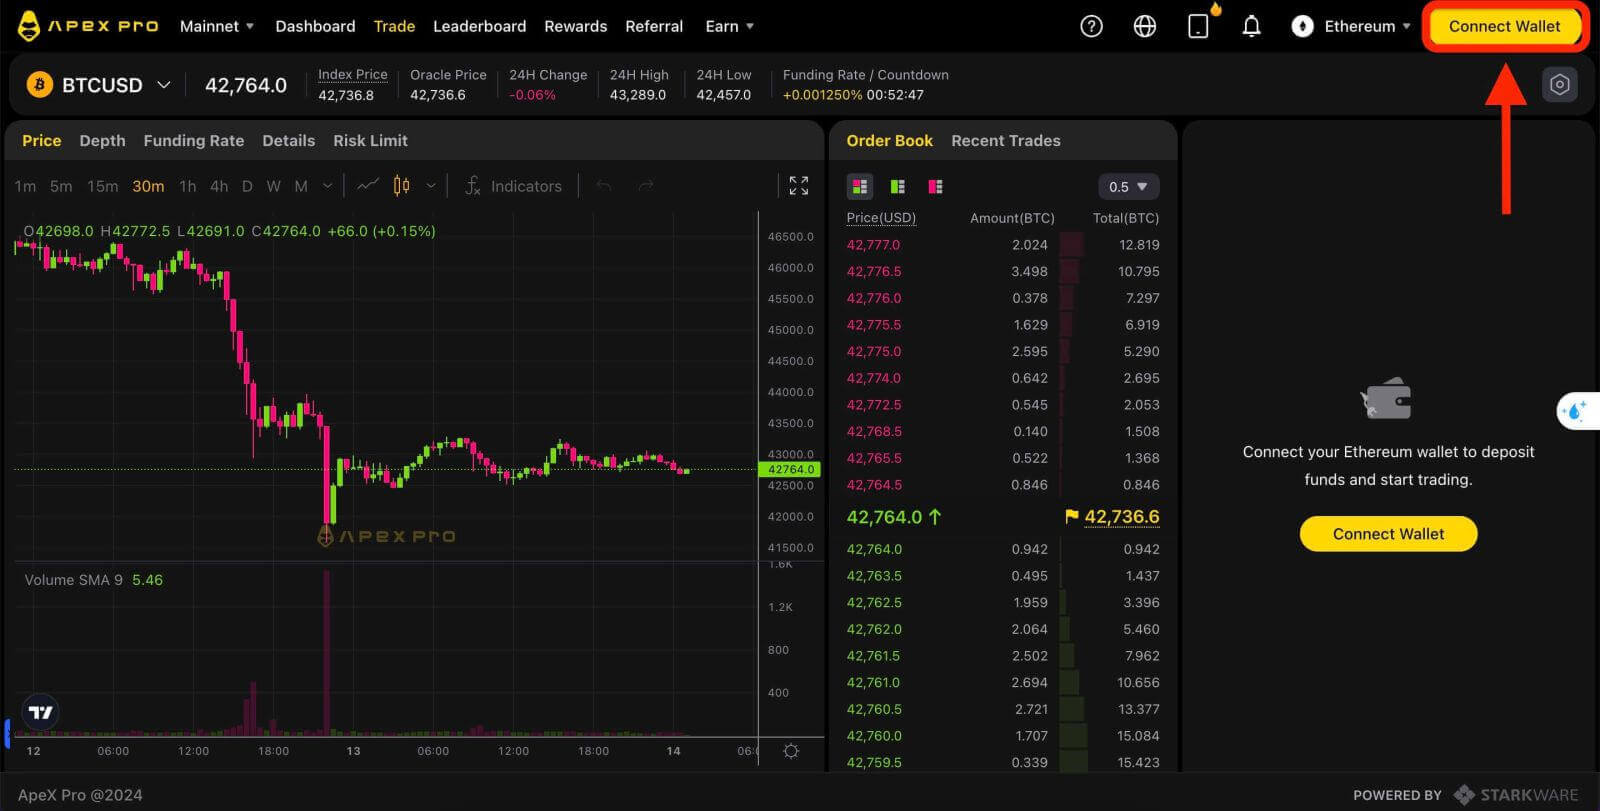
2. The website lets you in the Main Home page, then continue to click on the [Connect Wallet] in the top right corner.
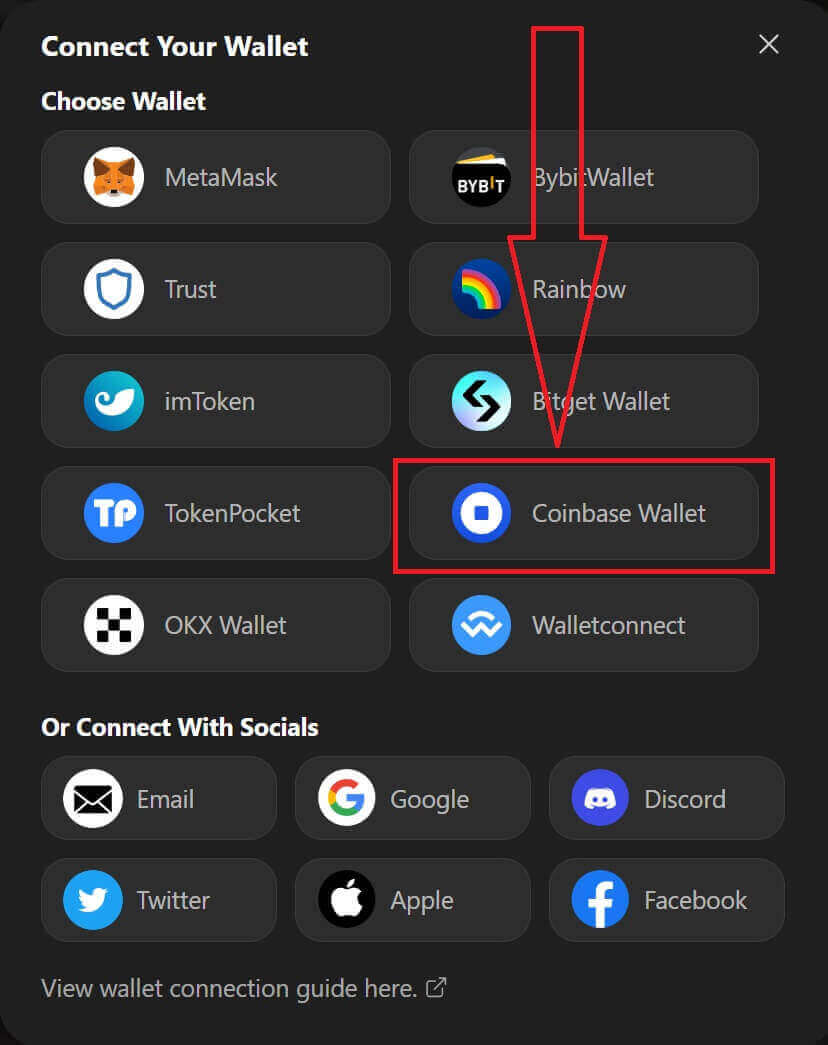
3. Click on [Coinbase Wallet] to start connecting.
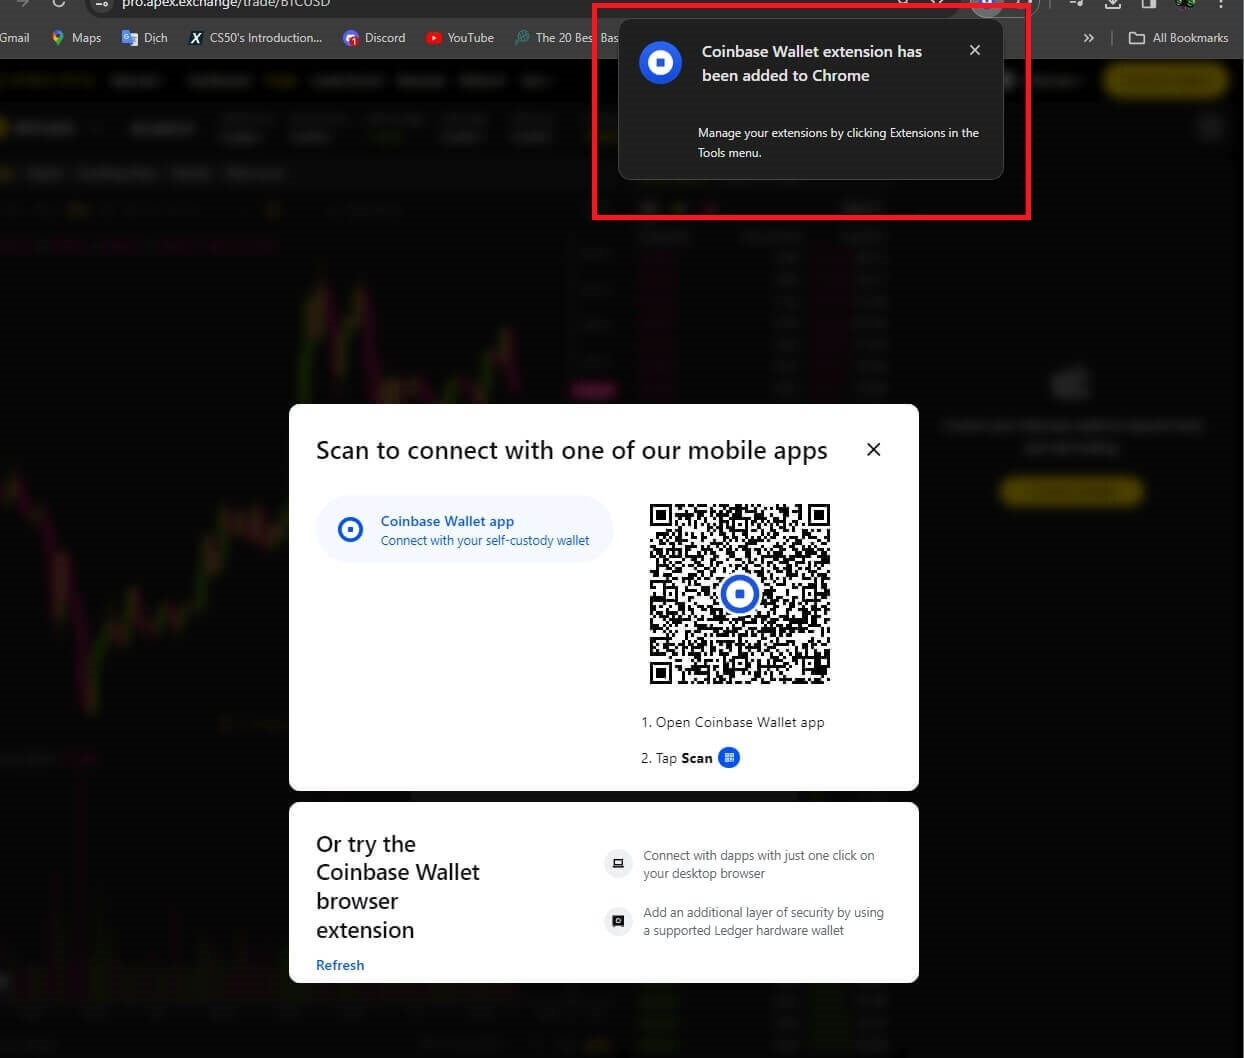
4. First, add the browser extension of Coinbase Wallet.
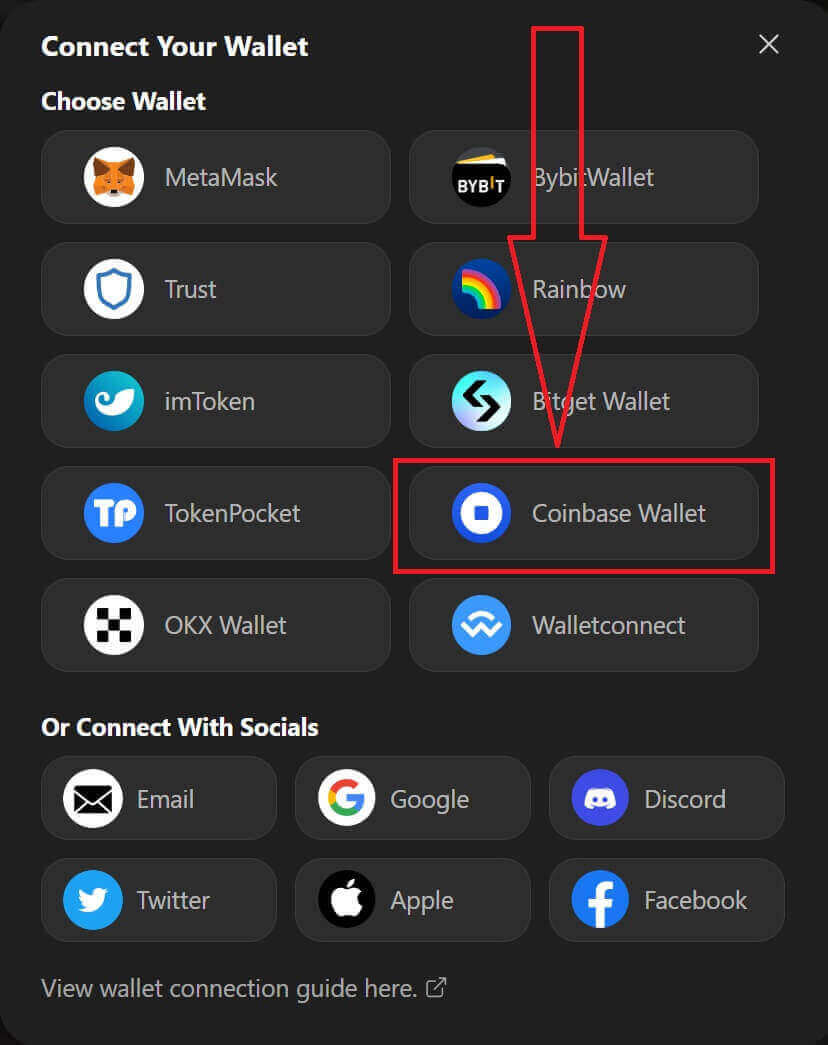
5. Refresh the tab then click [Connect Wallet] again, a pop-up window comes up, you need to click on [Coinbase Wallet] to choose Coinbase Wallet.
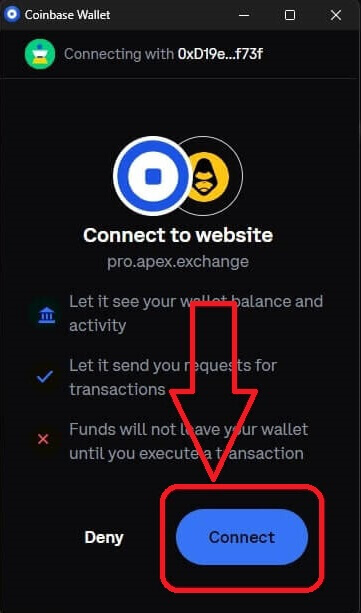
6. Click on [Connect] to start the connection process.
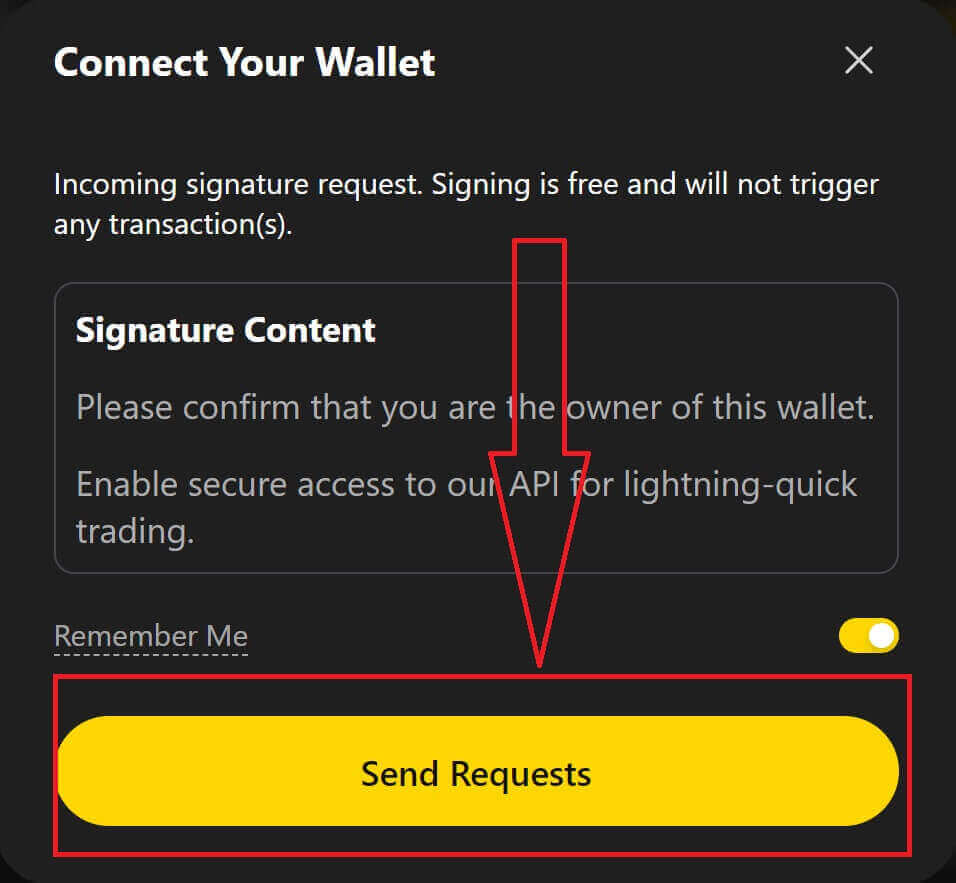
7. After connecting, A pop-up Request will come up, you need to click on [Send Requests] to continue the next step.
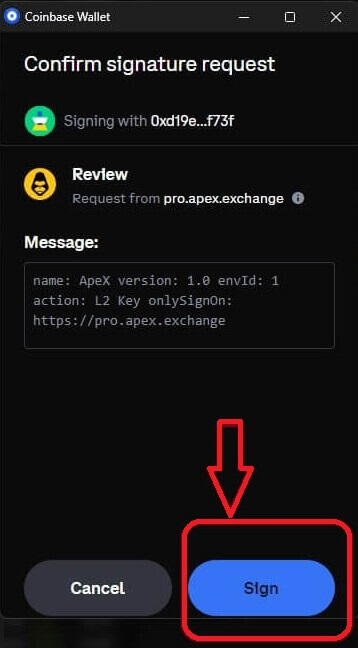
8. A pop-up window will come up to ask you for your signature to confirm that you are the owner of this wallet, click on [Sign] to complete the connection process.
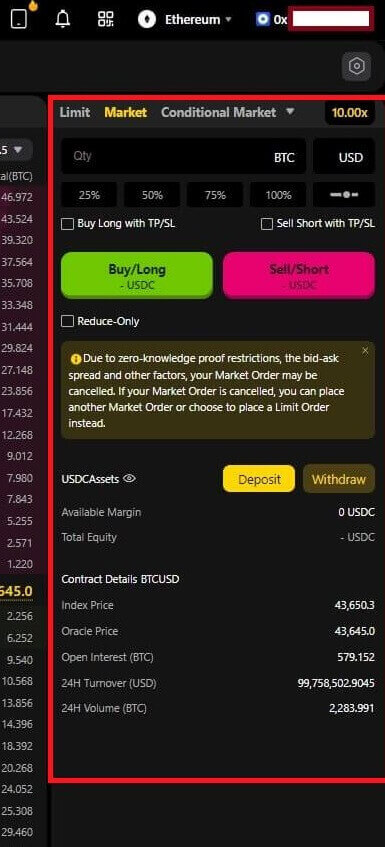
9. If it is a success, you can start trading in ApeX.
How to connect Wallet to ApeX via Google
1. If you want to create an account before connecting your wallet to [Apex], you can also do it by logging in with your [Google] account.
2. Choosing the [Google] tag to create an account.
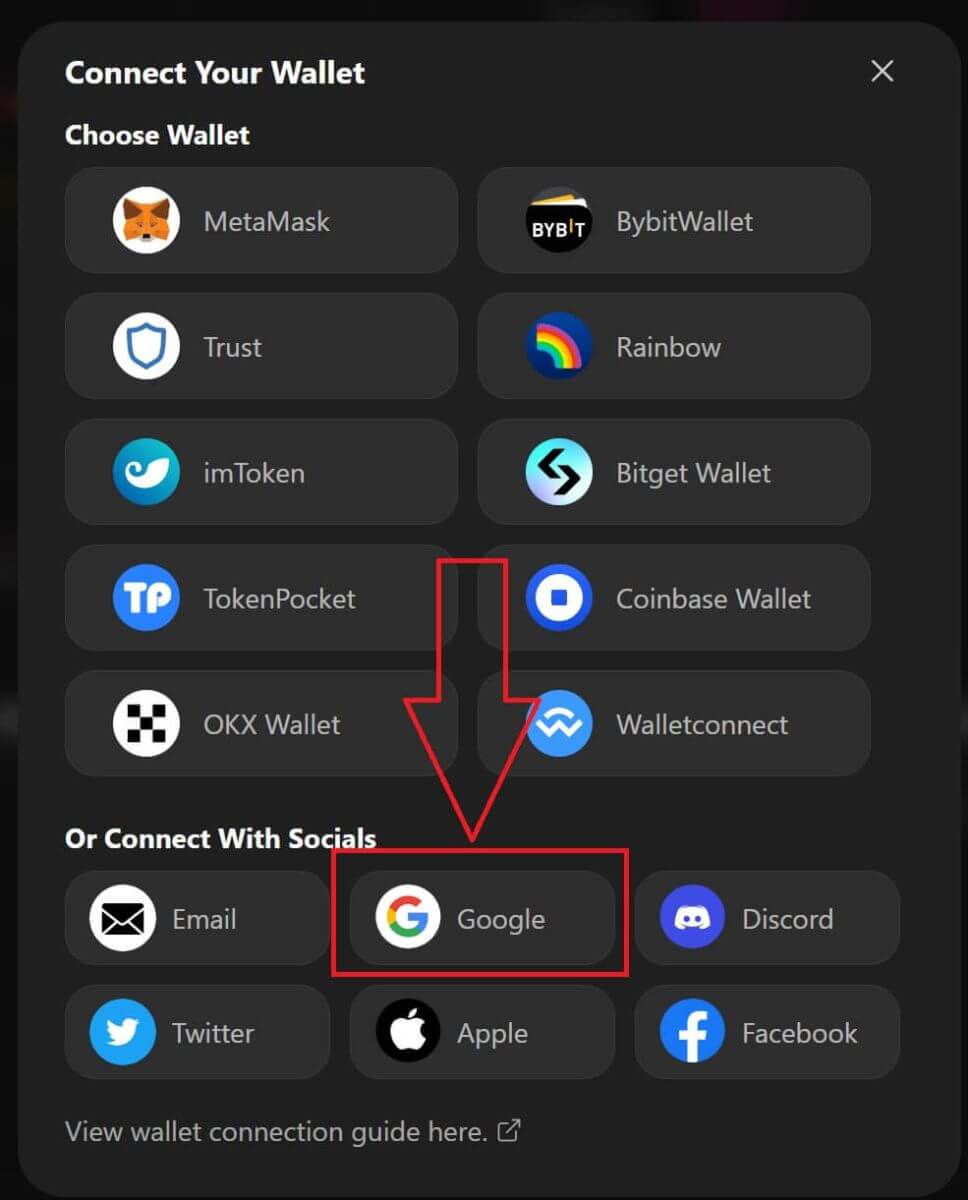
3. A pop-up window will appear asking you which [Google] account you want to use for signing in. Choosing your account or logging in to your account then the system will take it from here.
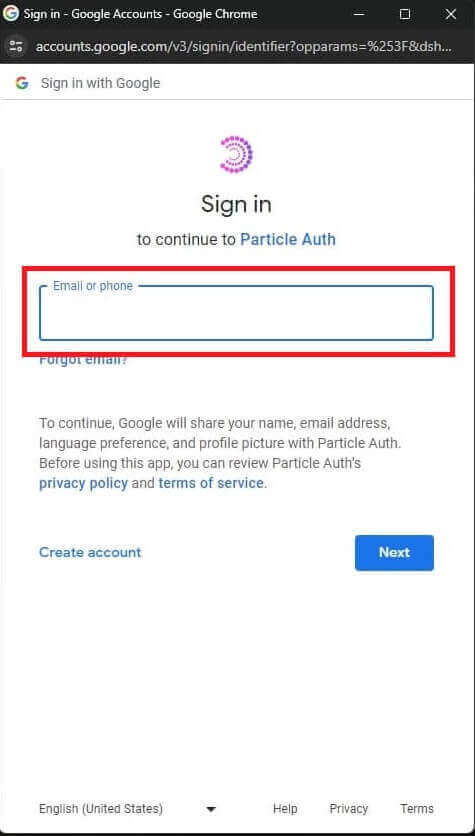
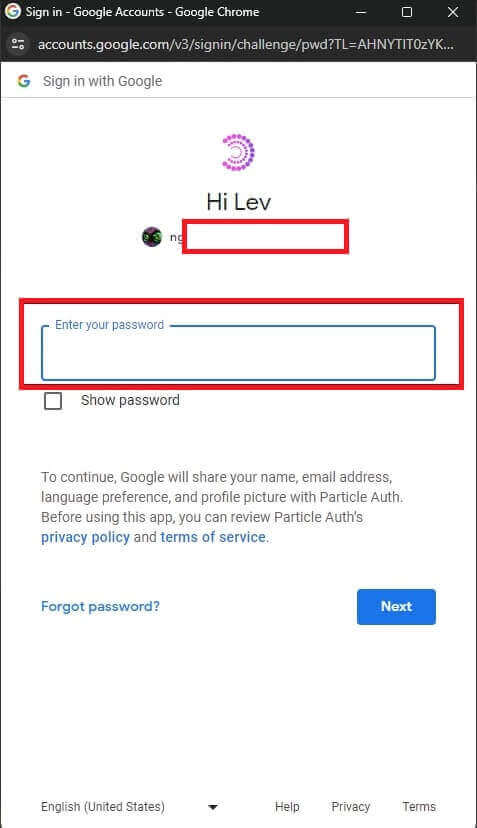
4. You have created an account in [ApeX], to start trading in [Apex] you need to connect your wallet to [ApeX], by following the tutorials above.
How to connect Wallet to ApeX via Facebook
1. Same as using [Google] account to create an account on [ApeX], you could also do it by logging in with your [Facebook] account.
2. Choosing the [Facebook] tag to create an account.
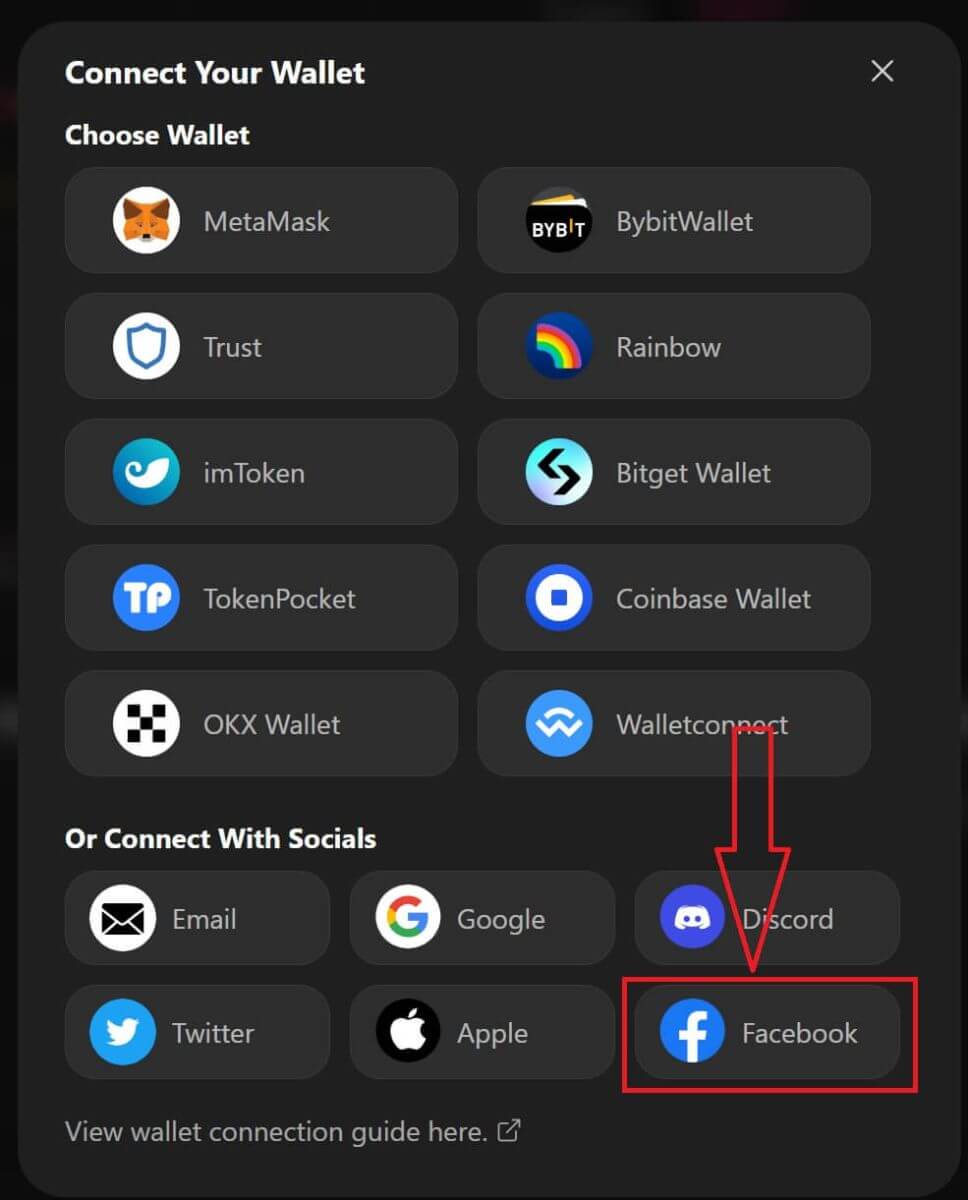
3. A pop-up window will appear asking you which [Facebook] account you want to use for signing in. Choosing your account and confirm then the system will take it from here.
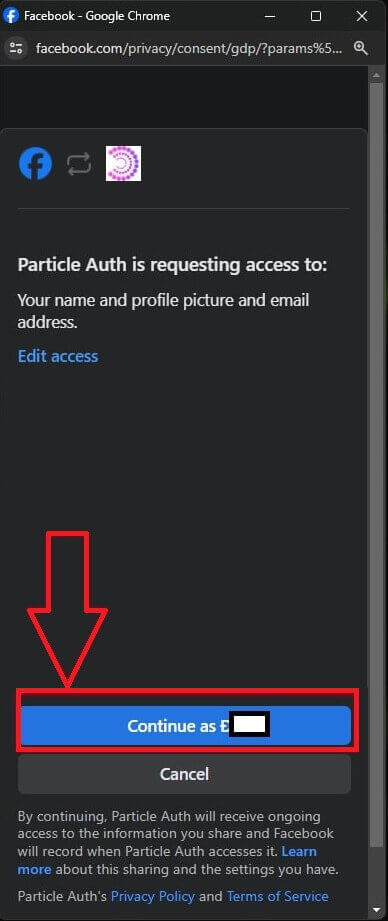
4. You have created an account in [ApeX], to start trading in [Apex] you need to connect your wallet to [ApeX], by following the tutorials above.
How to connect Wallet on the ApeX App
By QR code
1. After connecting your wallet on the ApeX desktop, the fastest way to sync your connection to the ApeX app is to sync your account/wallet connection to the app by the QR code.
2. In the Mainnet of [ApeX] click on the QR code icon on the top right corner.

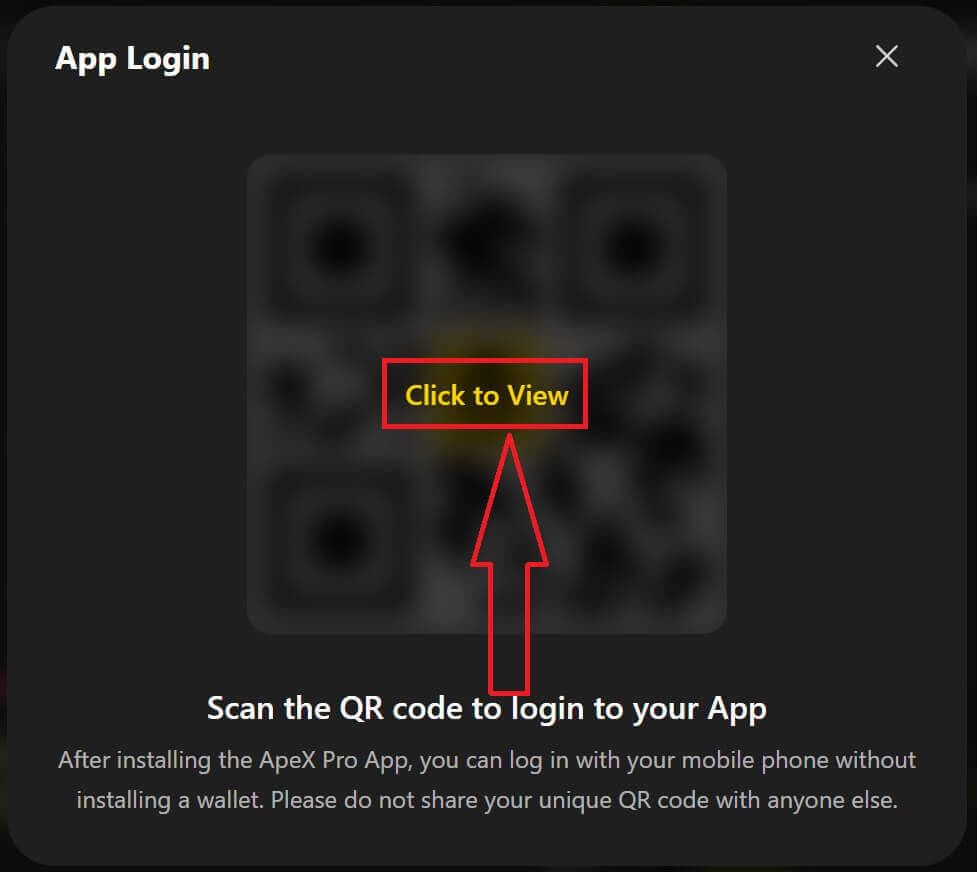
3. A pop-up window will come up, click on [Click to View] then your QR code will appear then open the ApeX app on your phone.
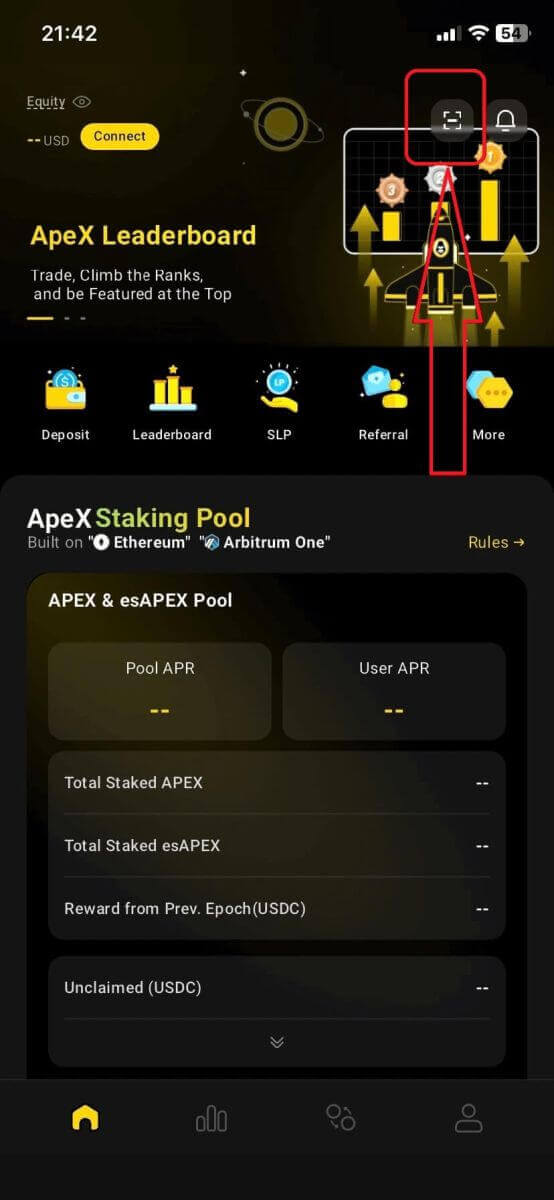
4. Click on the Scan icon in the top right corner.
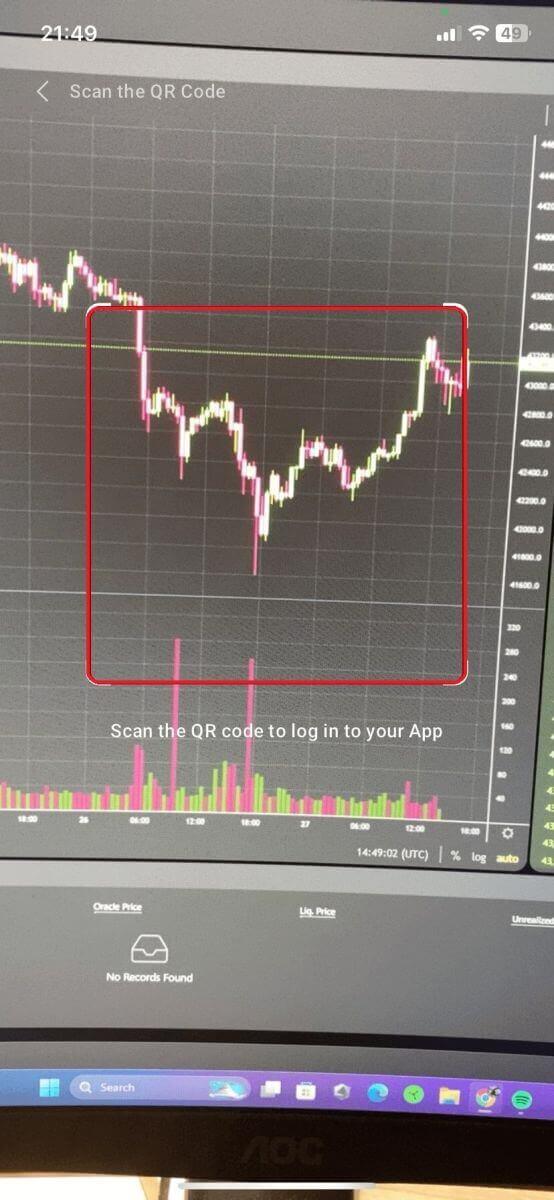
5. The scanning screen will appear, make sure to set your QR code in the red frame to log in to your app successfully.
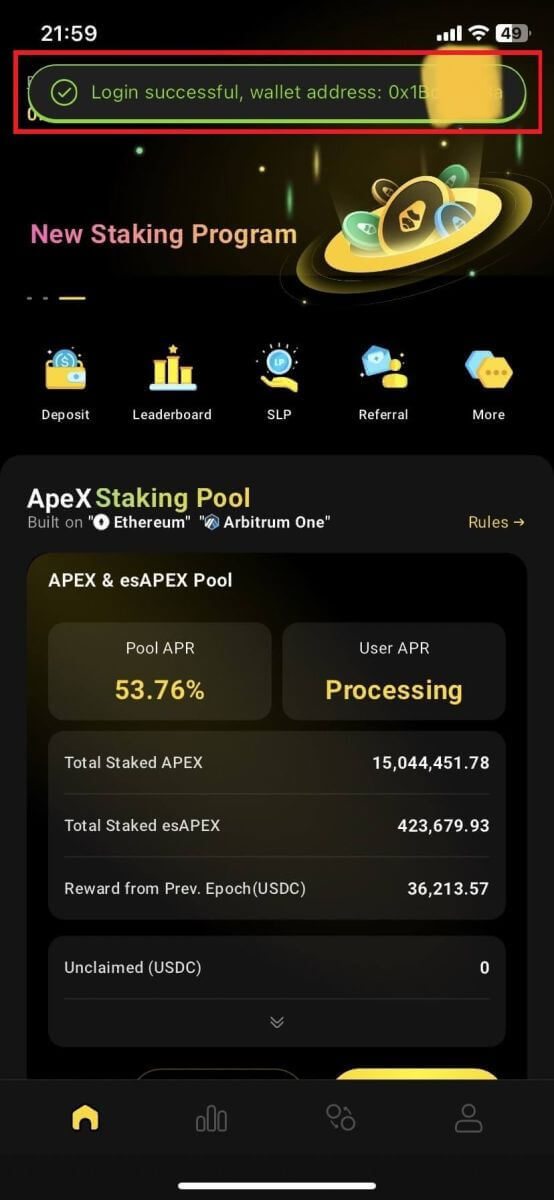
6. If the connection is successful, it will appear a pop-up message like the one below in your Apex app.
7. The connection will depend on which connection have you connected to ApeX on your Desktop.
Connect a wallet
1. First, choose the [Connect] button in the top left corner of the main home.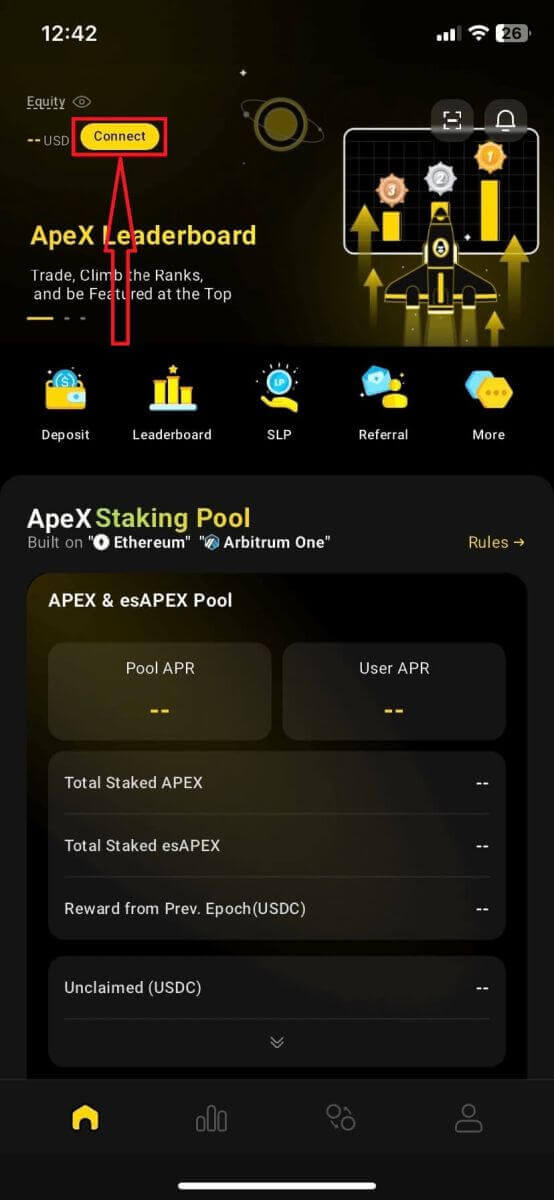
2. A pop-up window will come up, choose the chain you want to connect to and select the wallet you want to connect to.
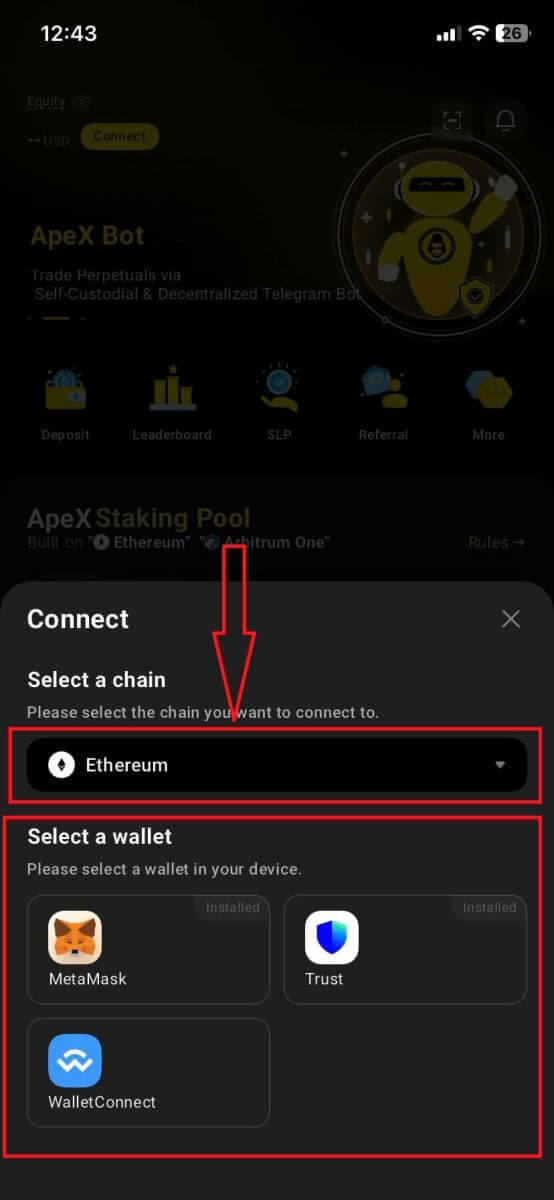
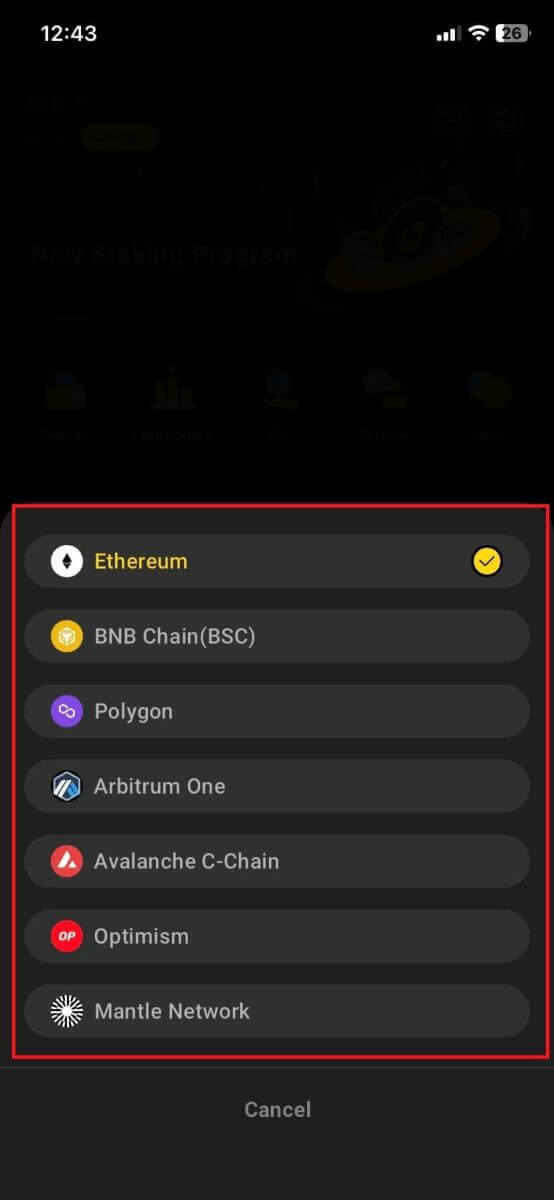
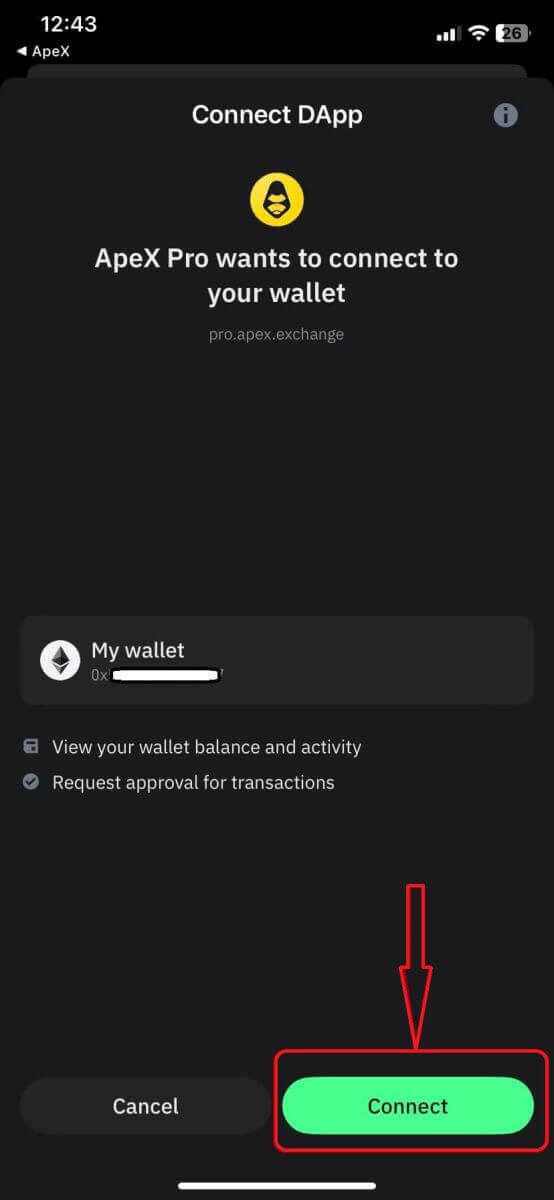
3. The app will need you to confirm the connection and verify it. The app of the wallet you choose will come up to ask for your confirmation about this.
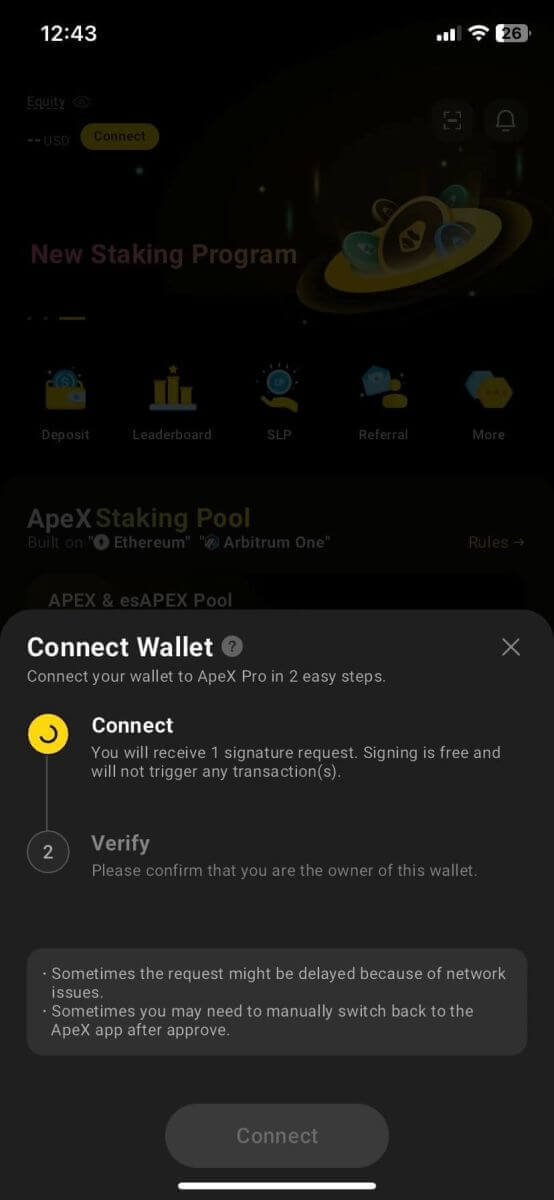
4. Choose [Connect] to start the process.
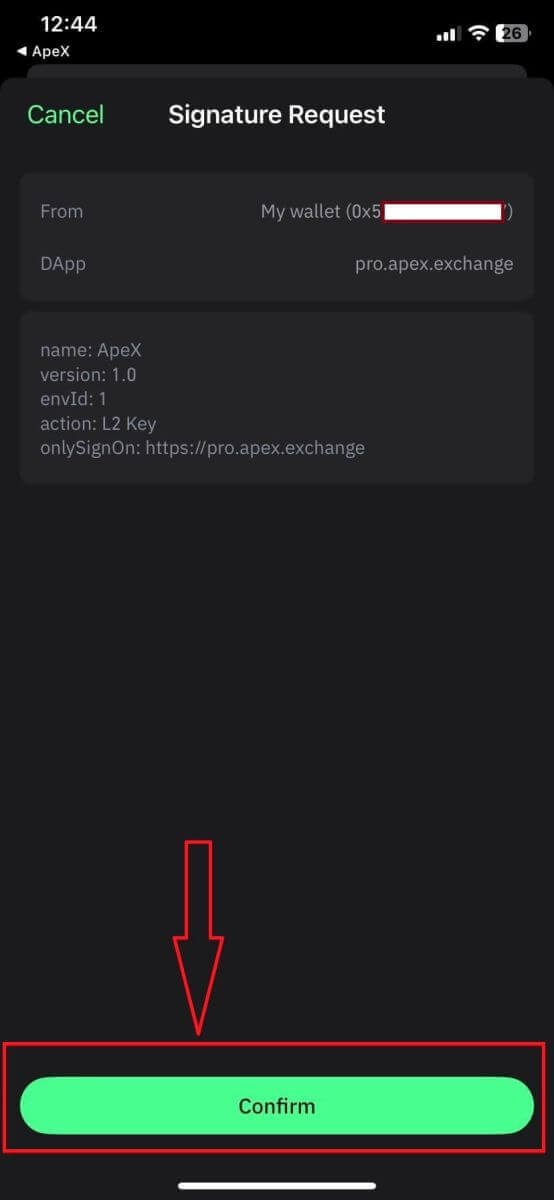
5. Click [Confirm] to complete the signature request
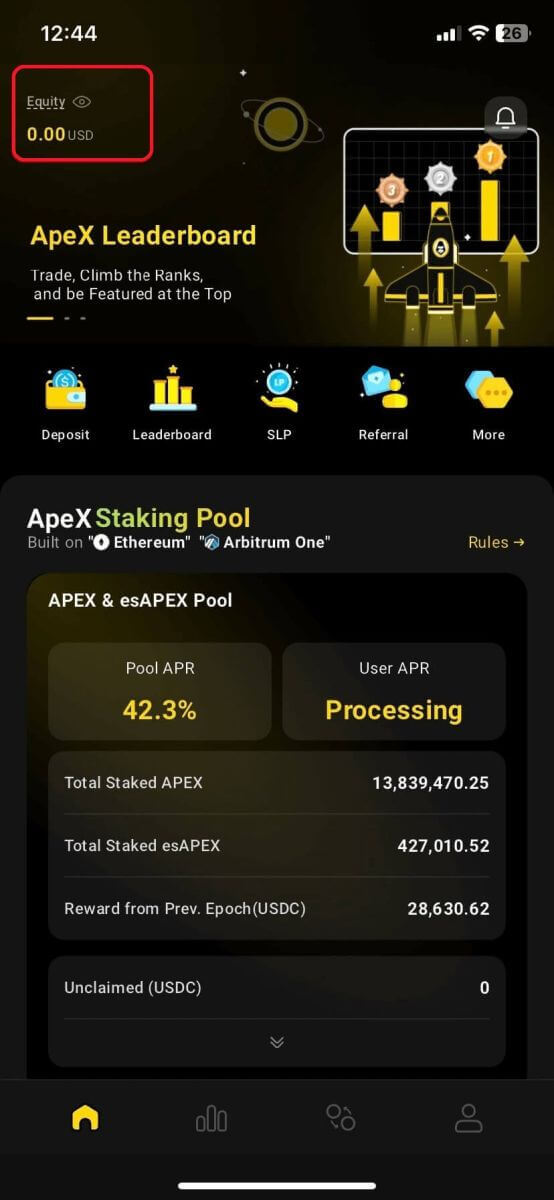
6. Here is the home page after finishing the connection.
Frequently Asked Questions (FAQ)
Is your platform safe? Are your smart contracts audited?
Yes, smart contracts on ApeX Protocol (and ApeX Pro) are fully audited by BlockSec. We are also planning to support a bug bounty campaign with secure3 to help mitigate the risk of exploits on the platform.
What wallets does Apex Pro support?
Apex Pro currently supports:
- MetaMask
- Trust
- Rainbow
- BybitWallet
- Bitget Wallet
- OKX Wallet
- Wallet connect
- imToken
- BitKeep
- TokenPocket
- Coinbase Wallet
Can Bybit users connect their wallets to ApeX Pro?
Bybit users can now connect their Web3 and Spot wallets to Apex Pro.
How do I switch to testnet?
To view the Testnet options, connect your wallet to ApeX Pro first. Under the ’Trade’ page, you will find test net options displayed next to the Apex Pro logo on the top left hand of the page.Select the preferred Testnet environment to proceed.

Unable to Connect Wallet
1. There could be various reasons for the difficulty in connecting your wallet to ApeX Pro on both the desktop and the app.
2. Desktop
- If you use wallets like MetaMask with in-browser integration, ensure you’re signed into your wallet via the integration before logging in to Apex Pro.
3. App
- Update your wallet app to the latest version. Also, ensure your ApeX Pro app is updated. If not, update both apps and try connecting again.
- Connectivity issues might arise due to VPN or server errors.
- Certain wallet apps might require being opened first before launching the Apex Pro app.
4. Consider submitting a ticket through the ApeX Pro Discord helpdesk for further assistance.


